We are starting a new Cliff module standard that is designed to work with our ocean standard as well as our MILS Modules.
Here are a few images of various pieces that we have as well as how they can be combined:
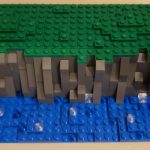
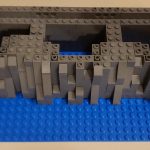
Straight
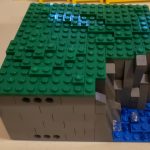
Outer Curve
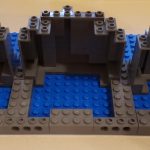
Inner Curve
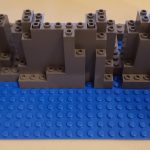
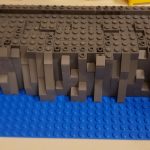
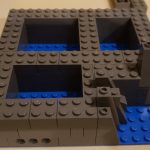
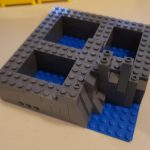
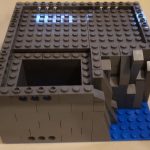
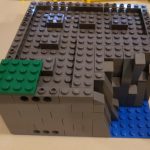
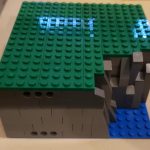
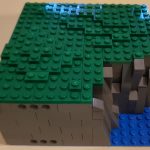
Here’s the modules above placed together:
The height of the Cliff is 5 bricks (from a MILS) or 6 bricks from the ocean height. On the connecting side, the cliff face must be on the 5th, 6th, or 7th stud from the front. This breaks from the normal MILS type standard where the transition is generally in the middle, so we can have a full 8 stud deep building on top of the cliff.
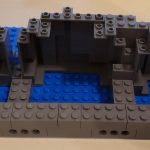
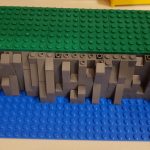
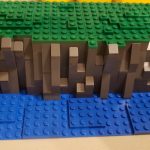
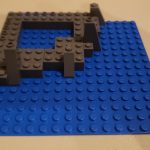
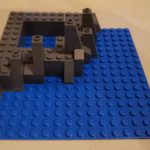
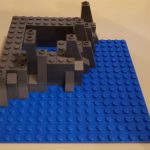
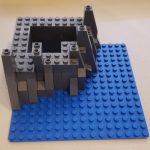
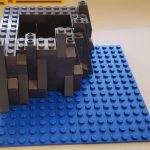
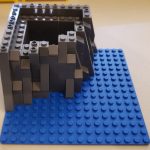
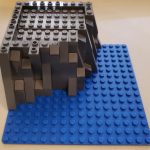
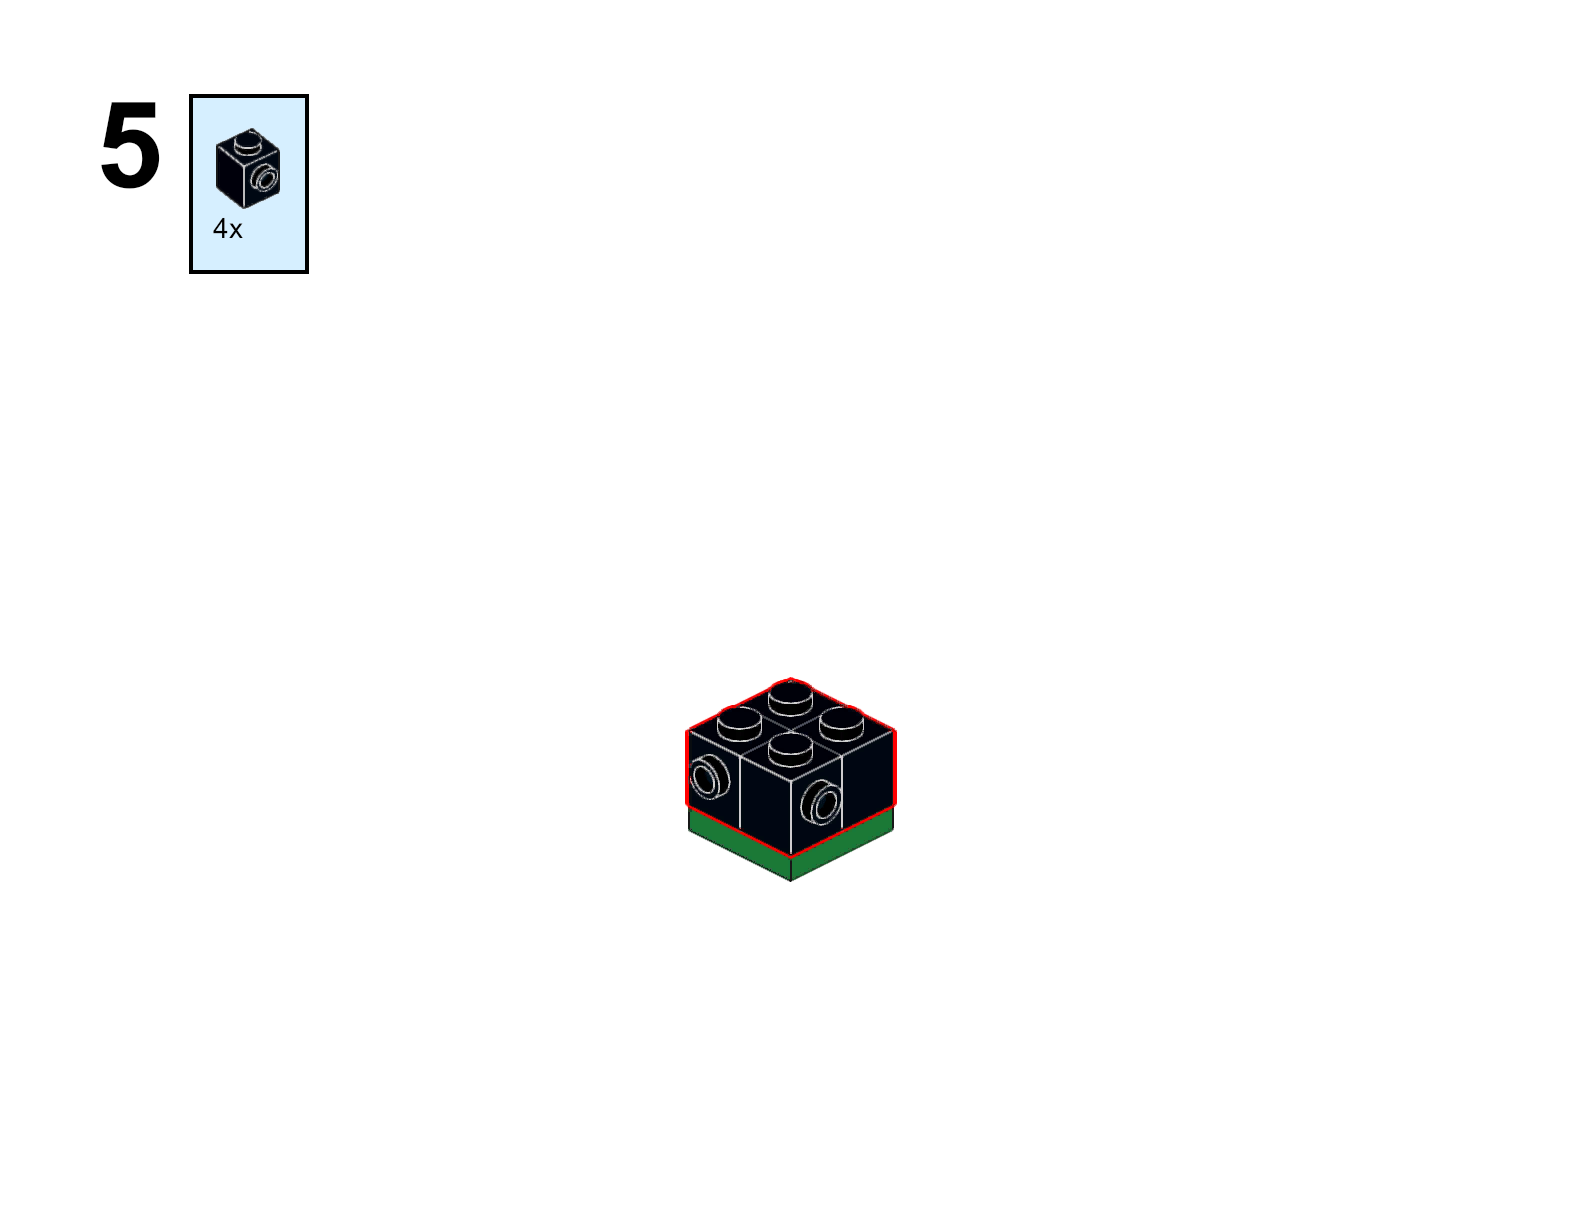
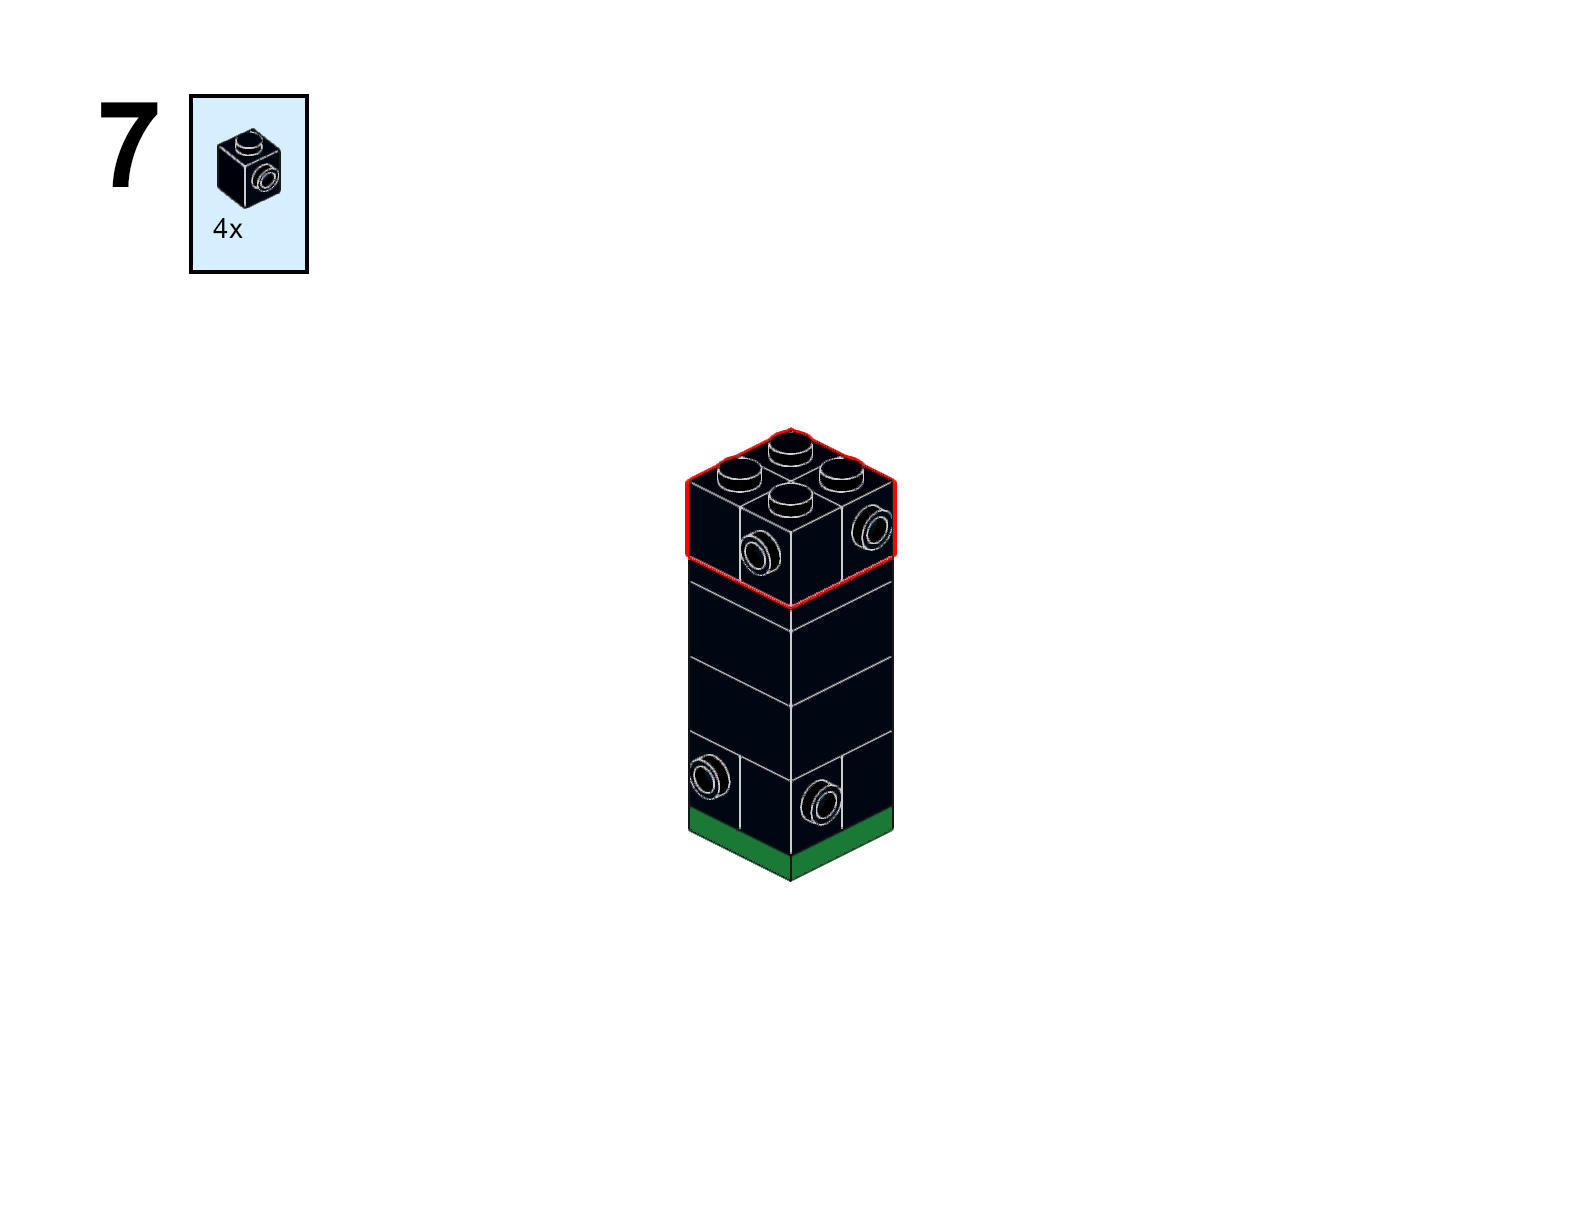
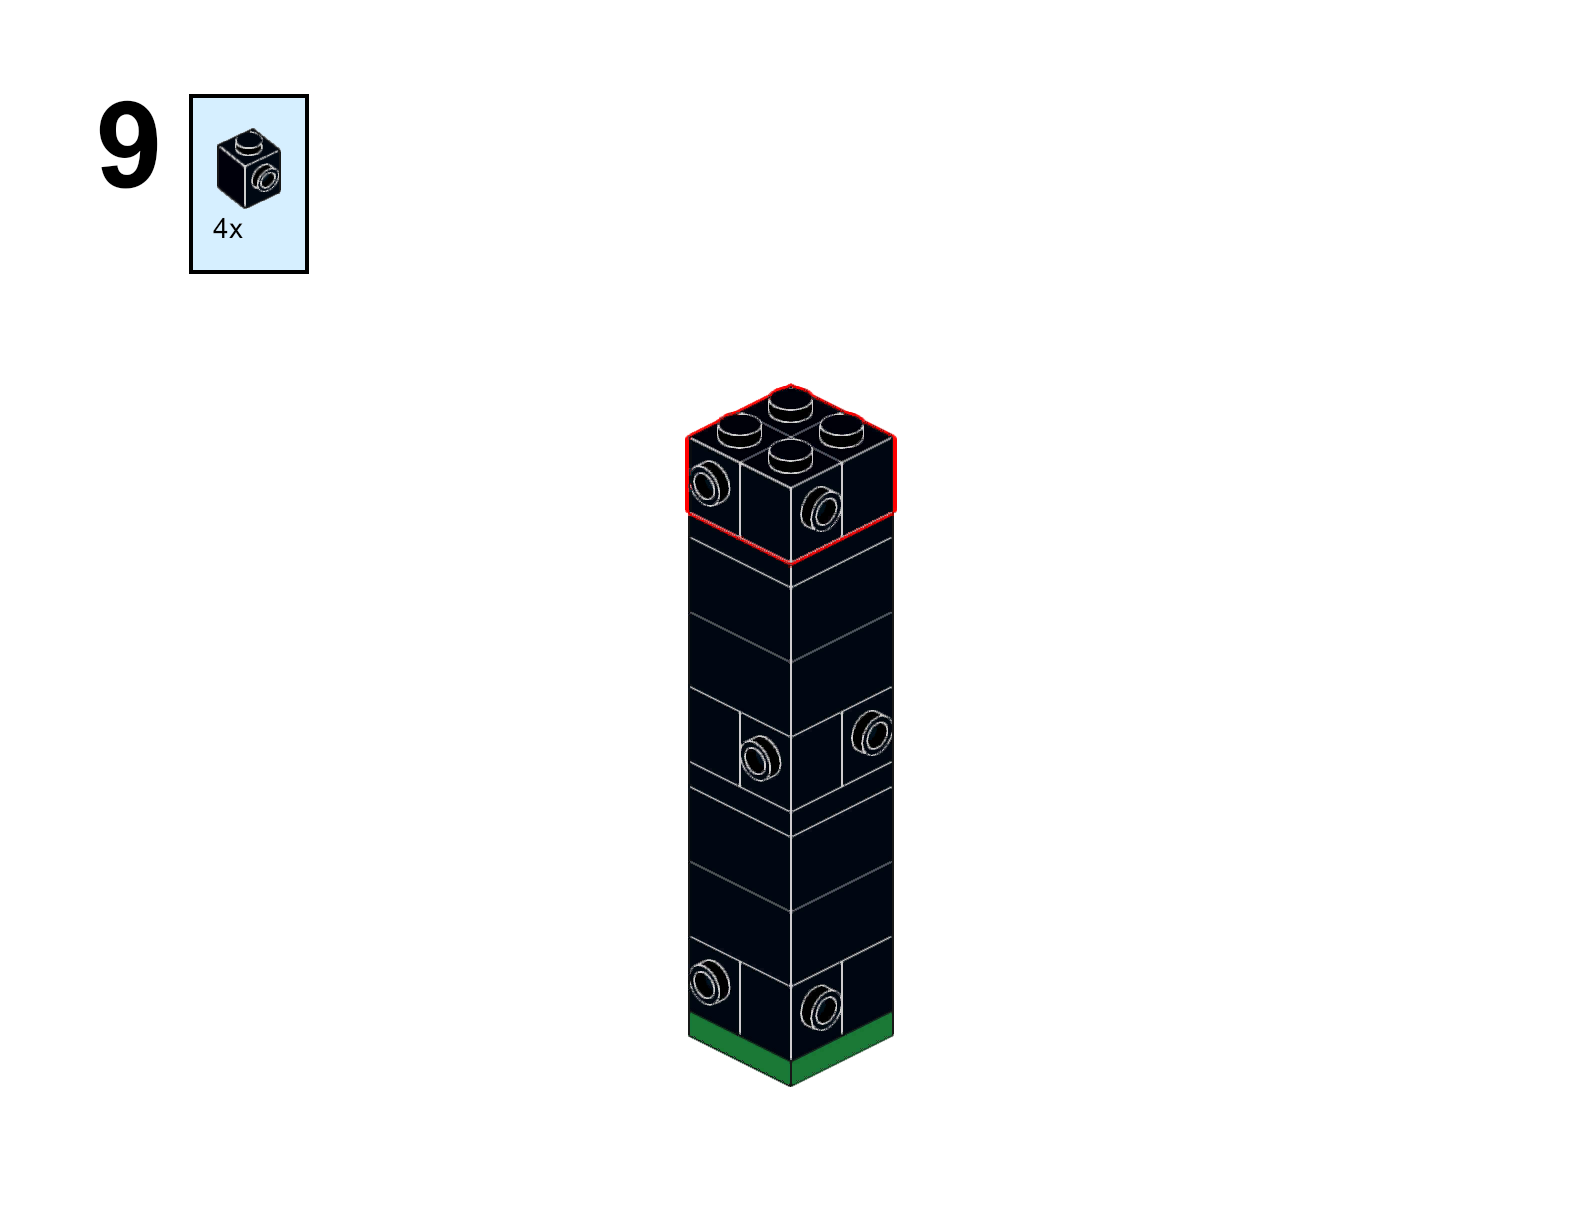
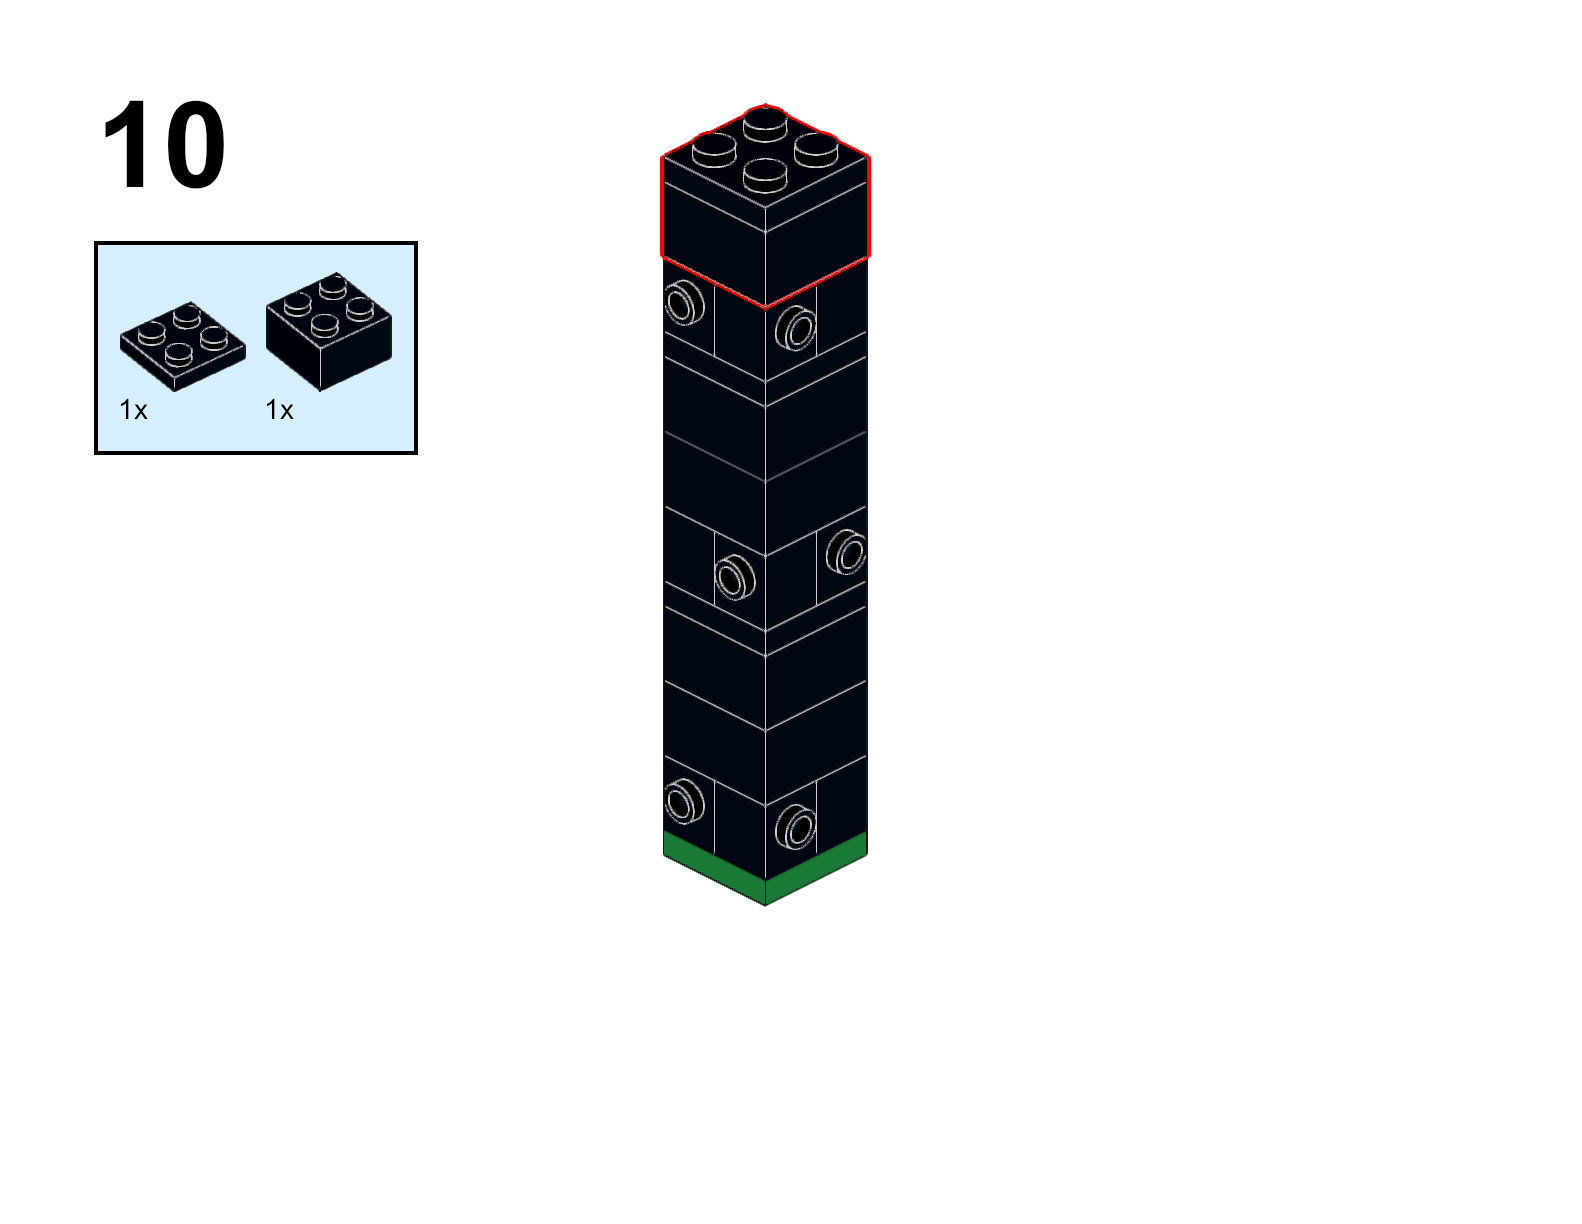
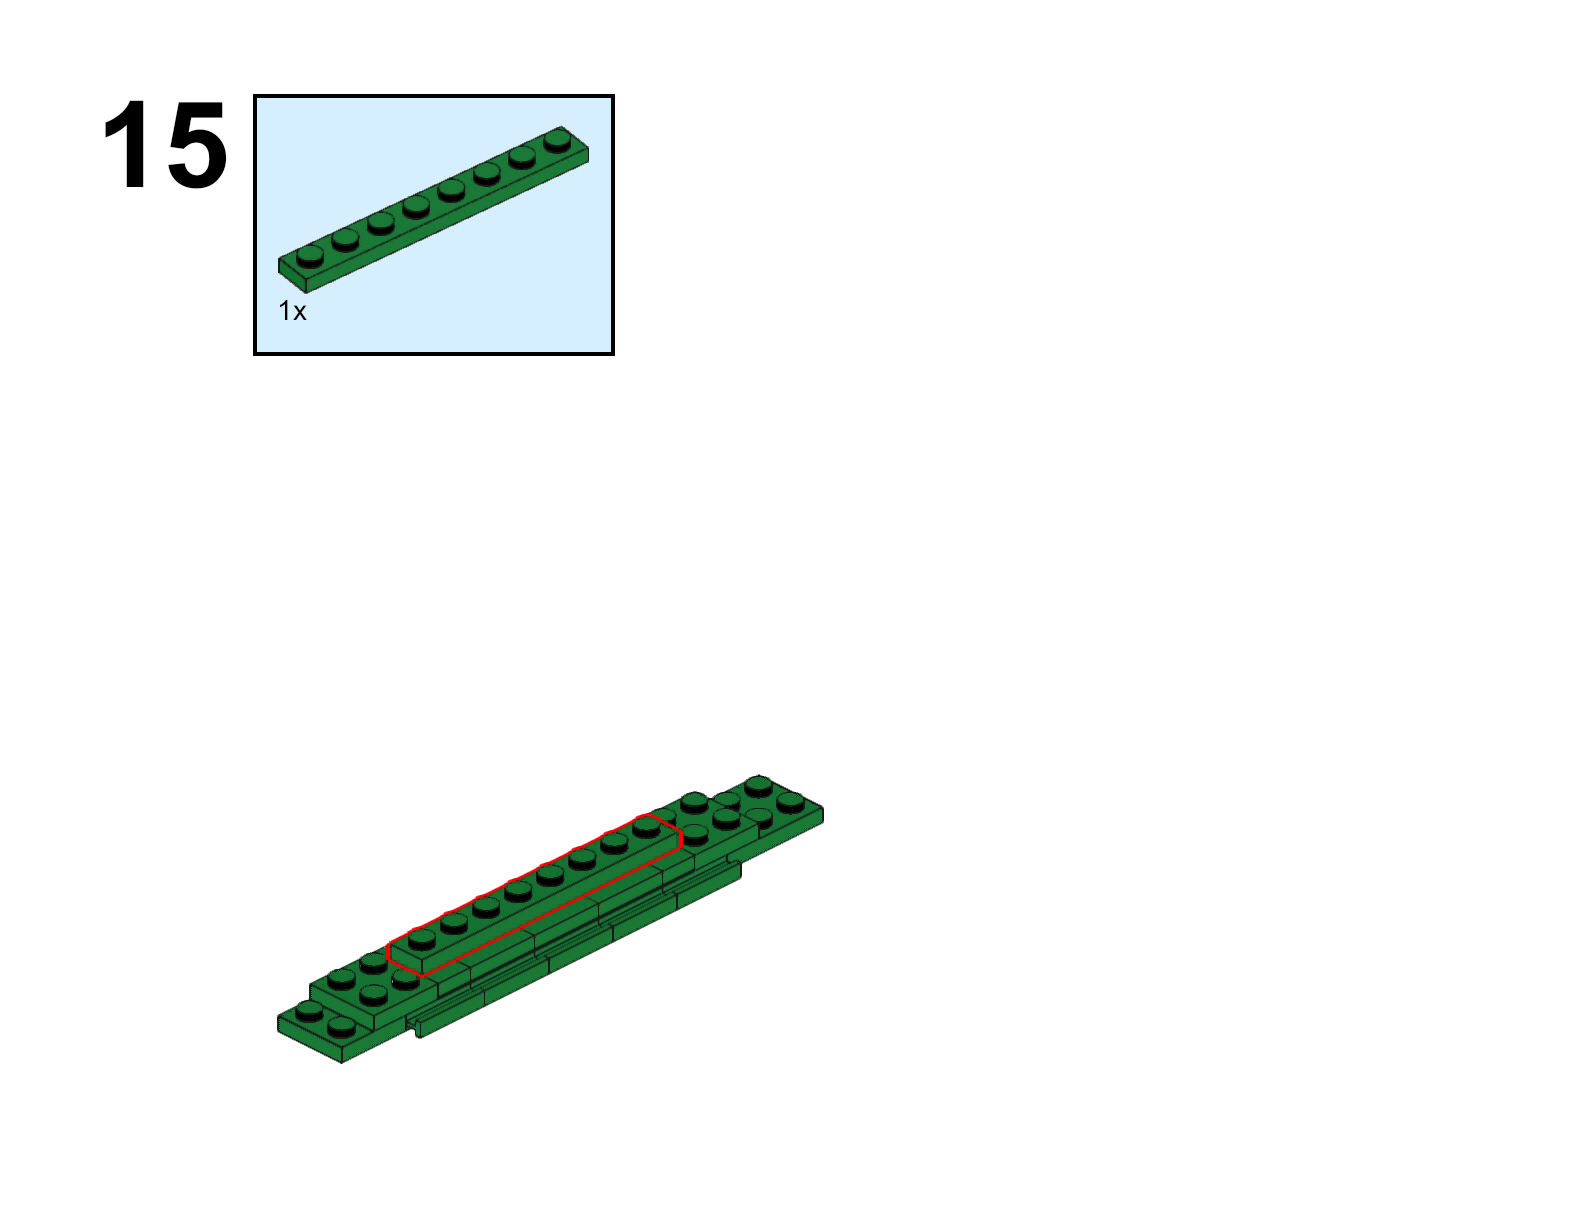
Here is a step by step guide for creating the straight cliff module:
Straight
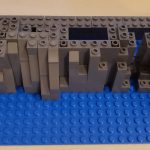
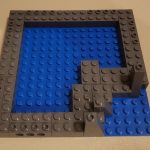
Here is a step by step guide for the convex corner which is on a 16×16 baseplate:
Outer Curve
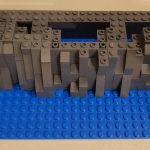
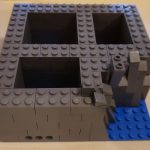
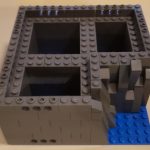
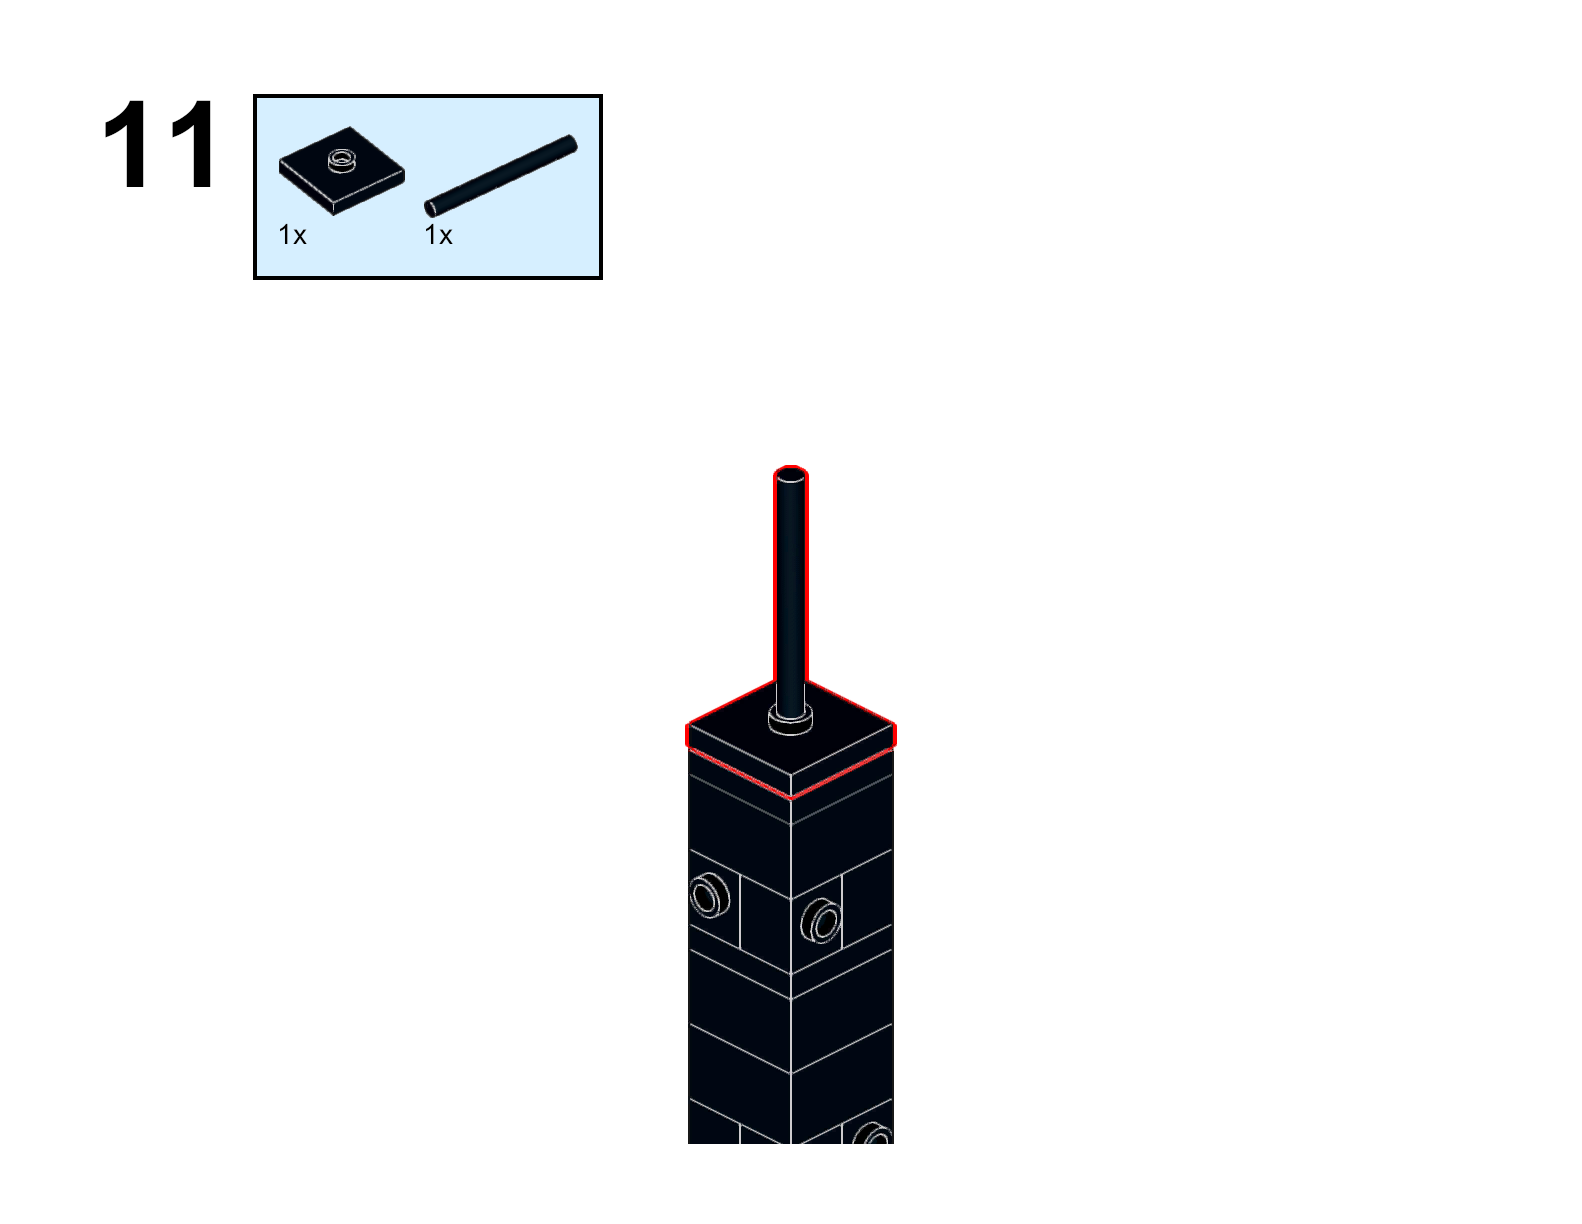
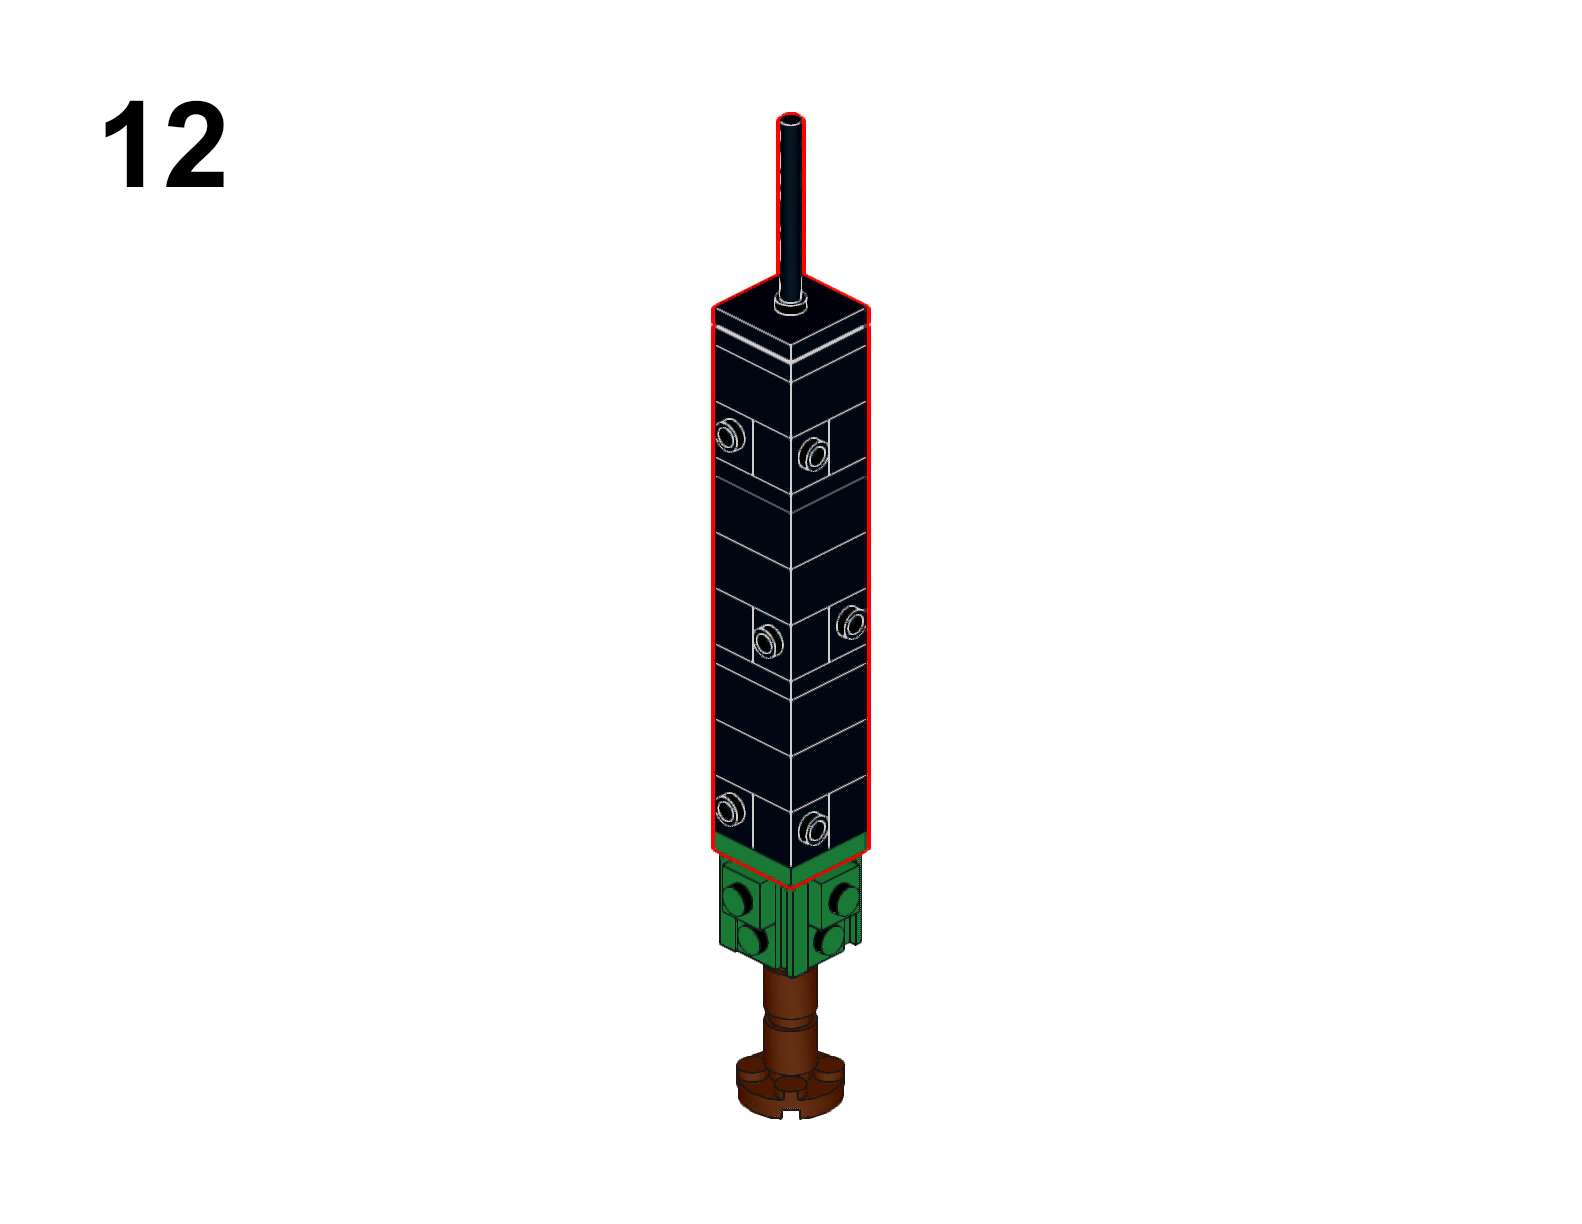
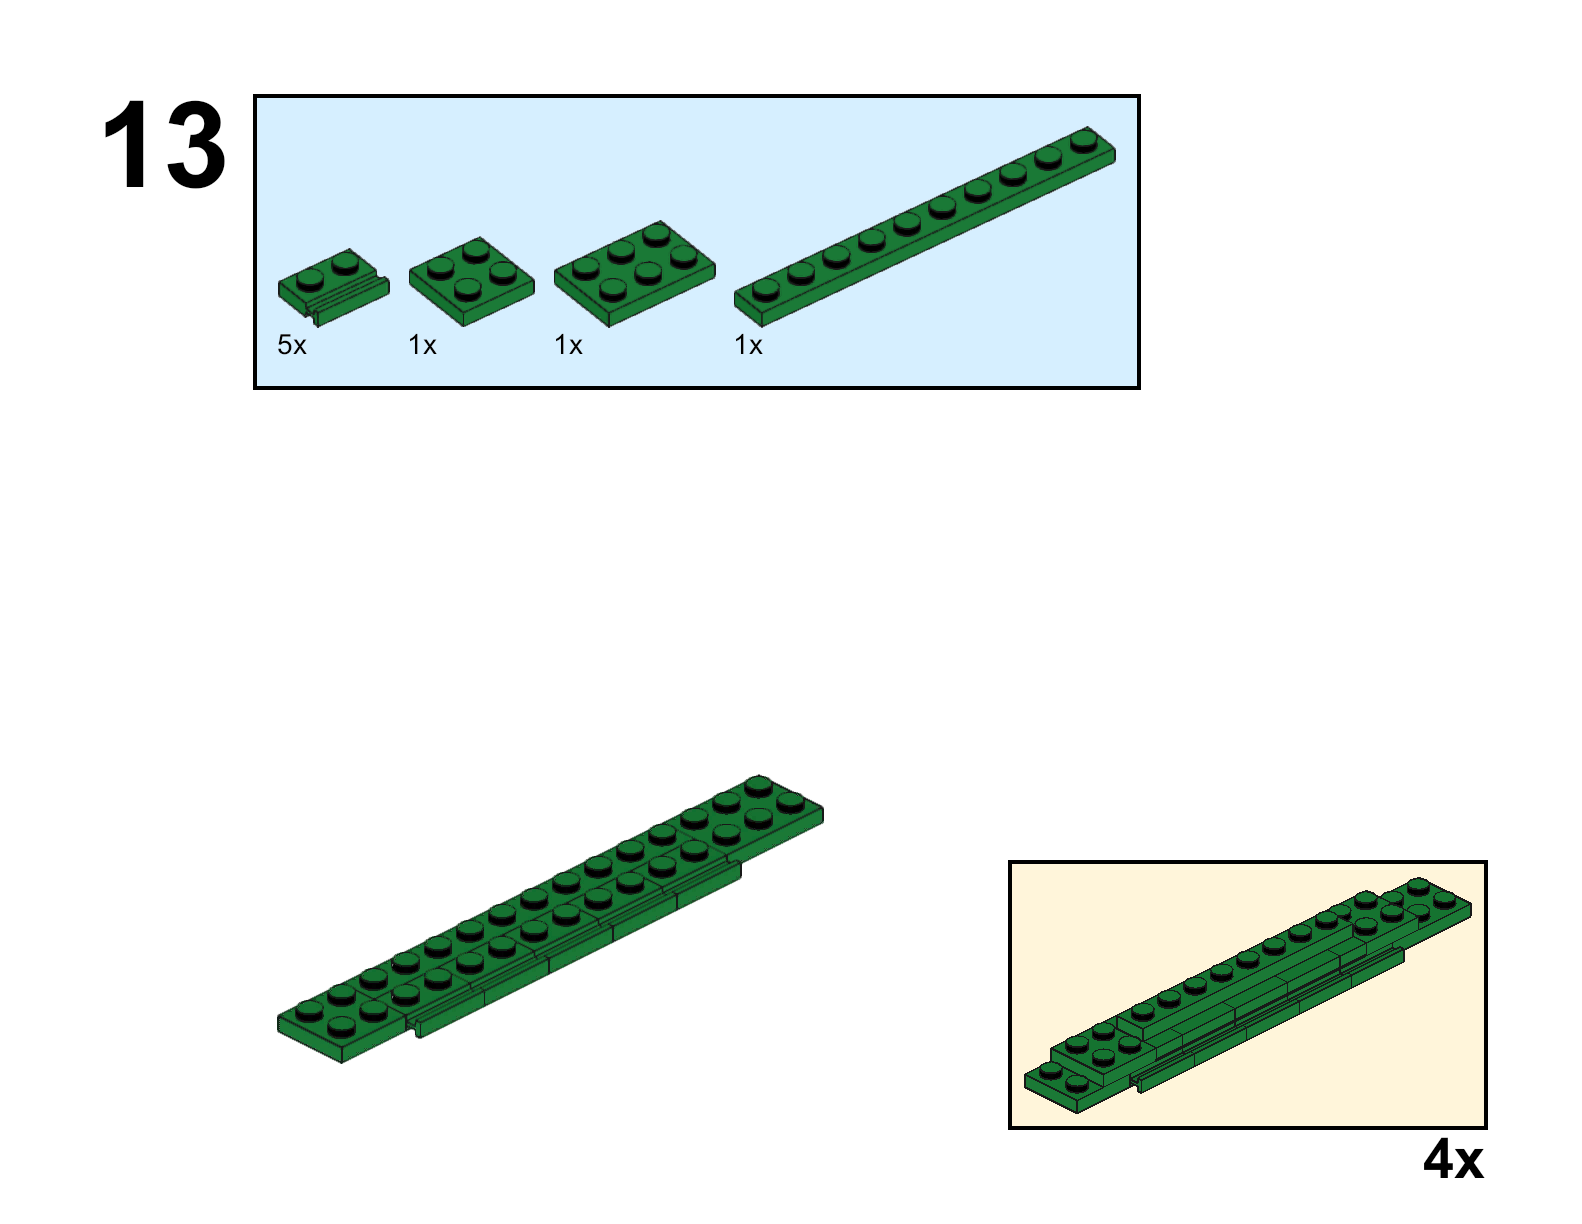
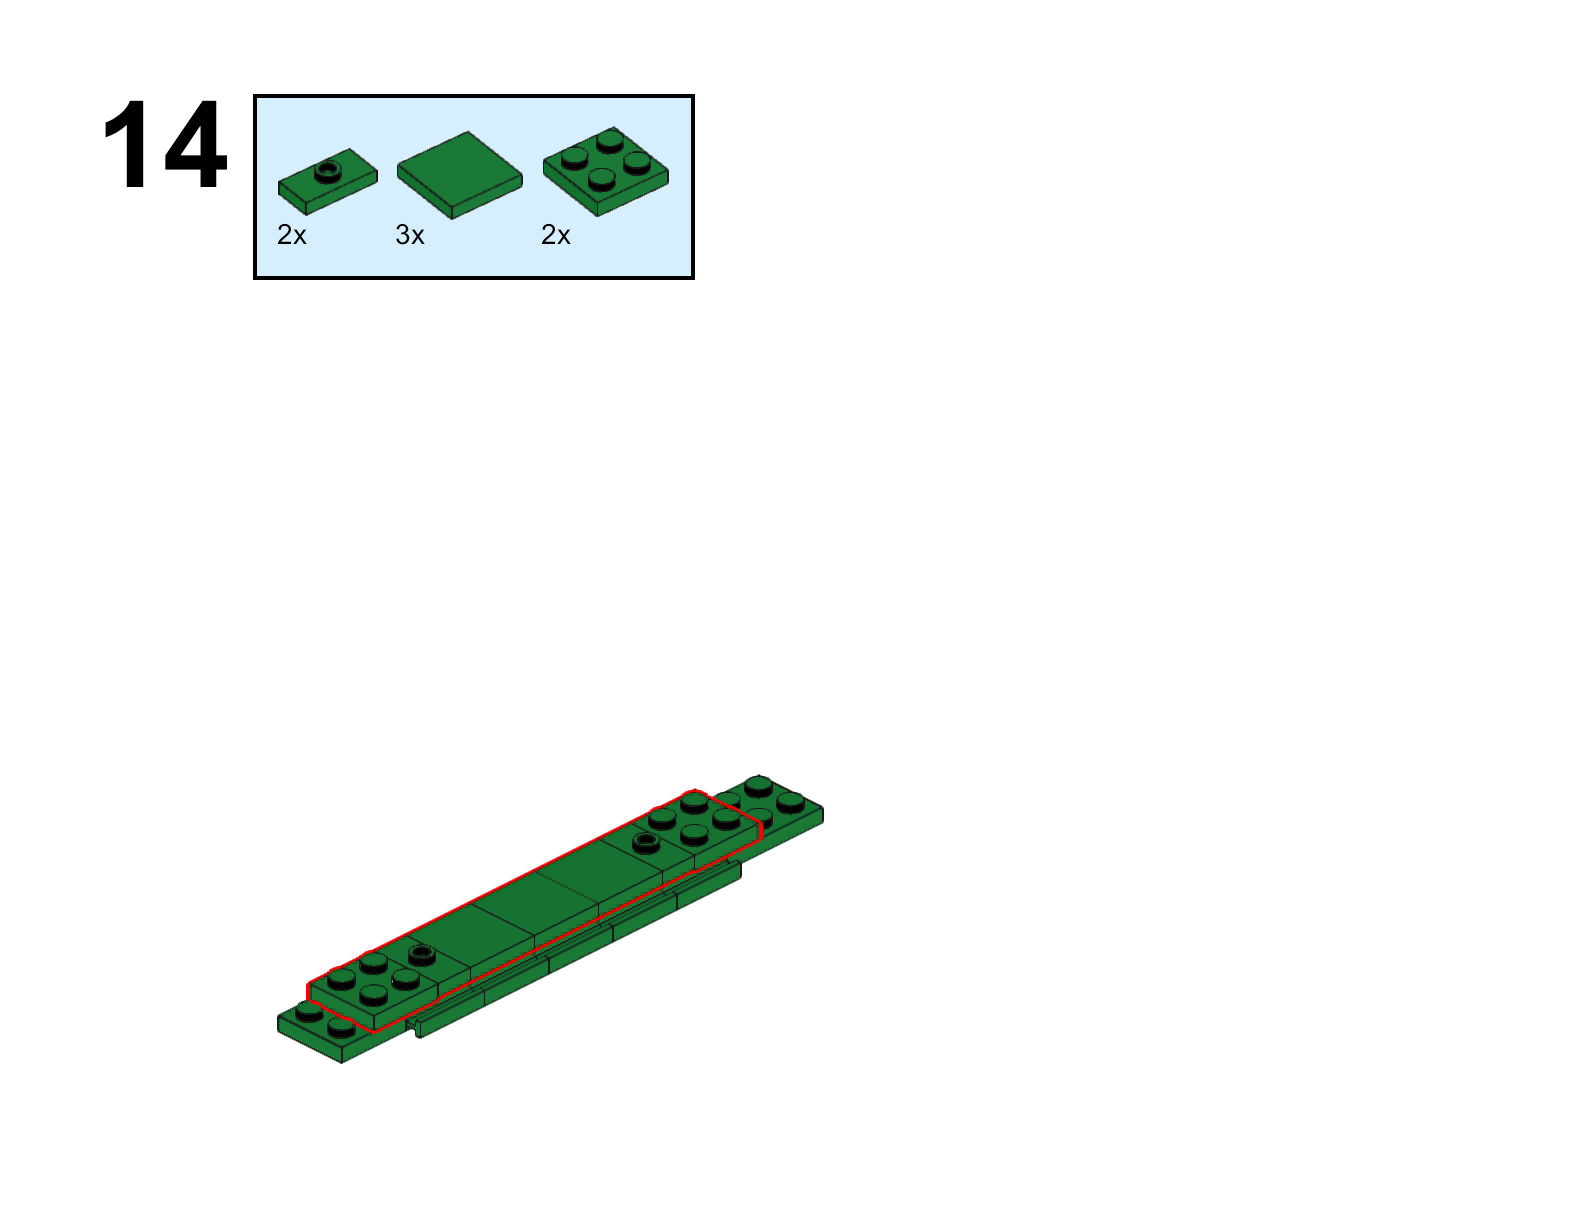
Here’s a step by step guide for a concave Cliff module:
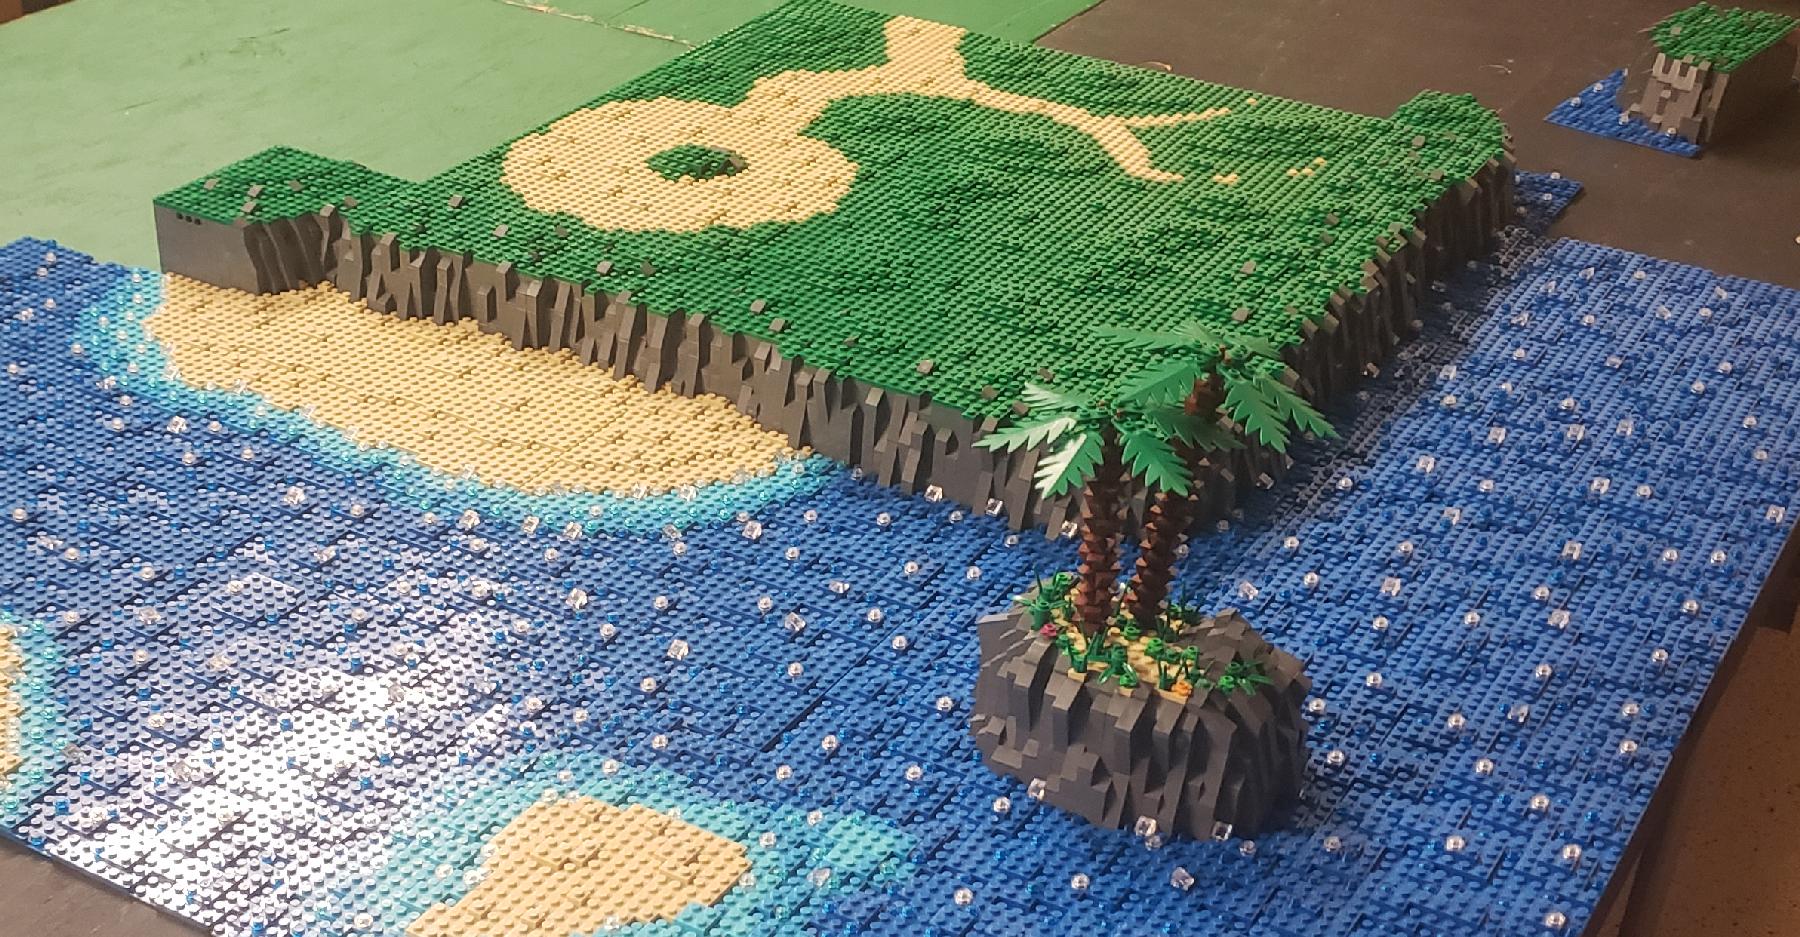
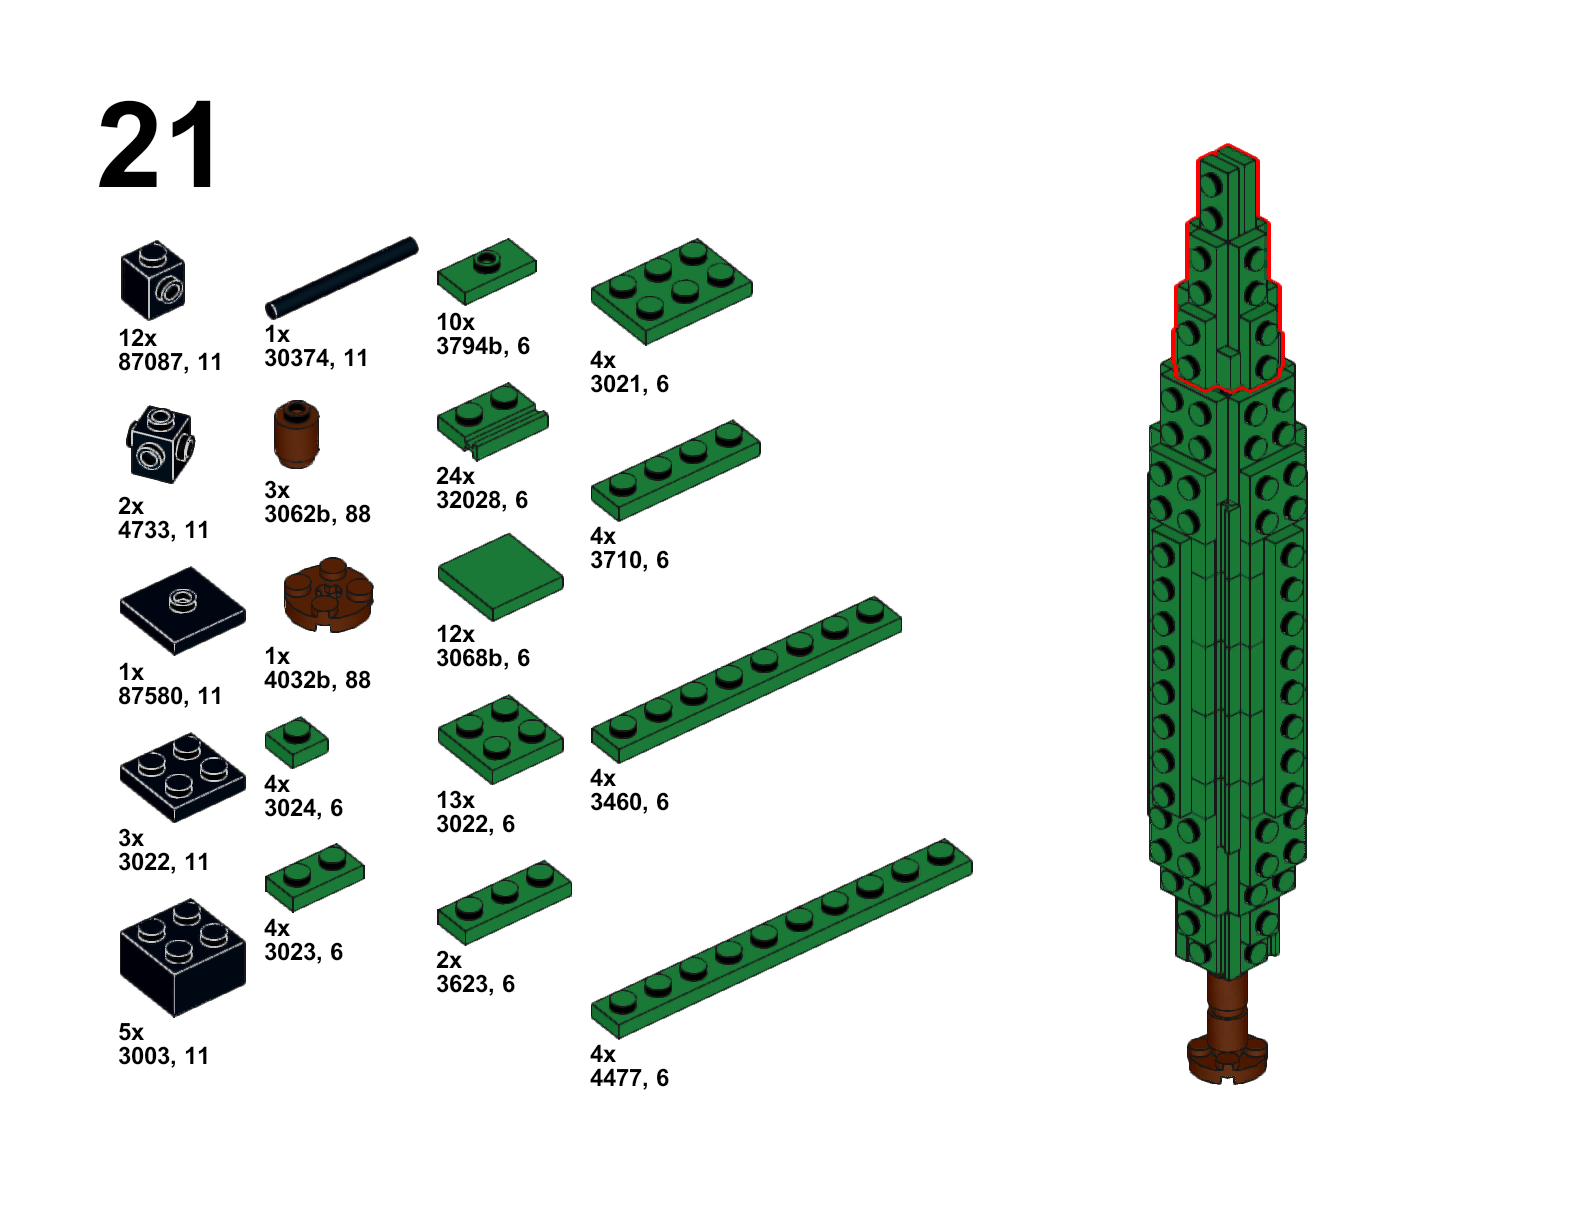
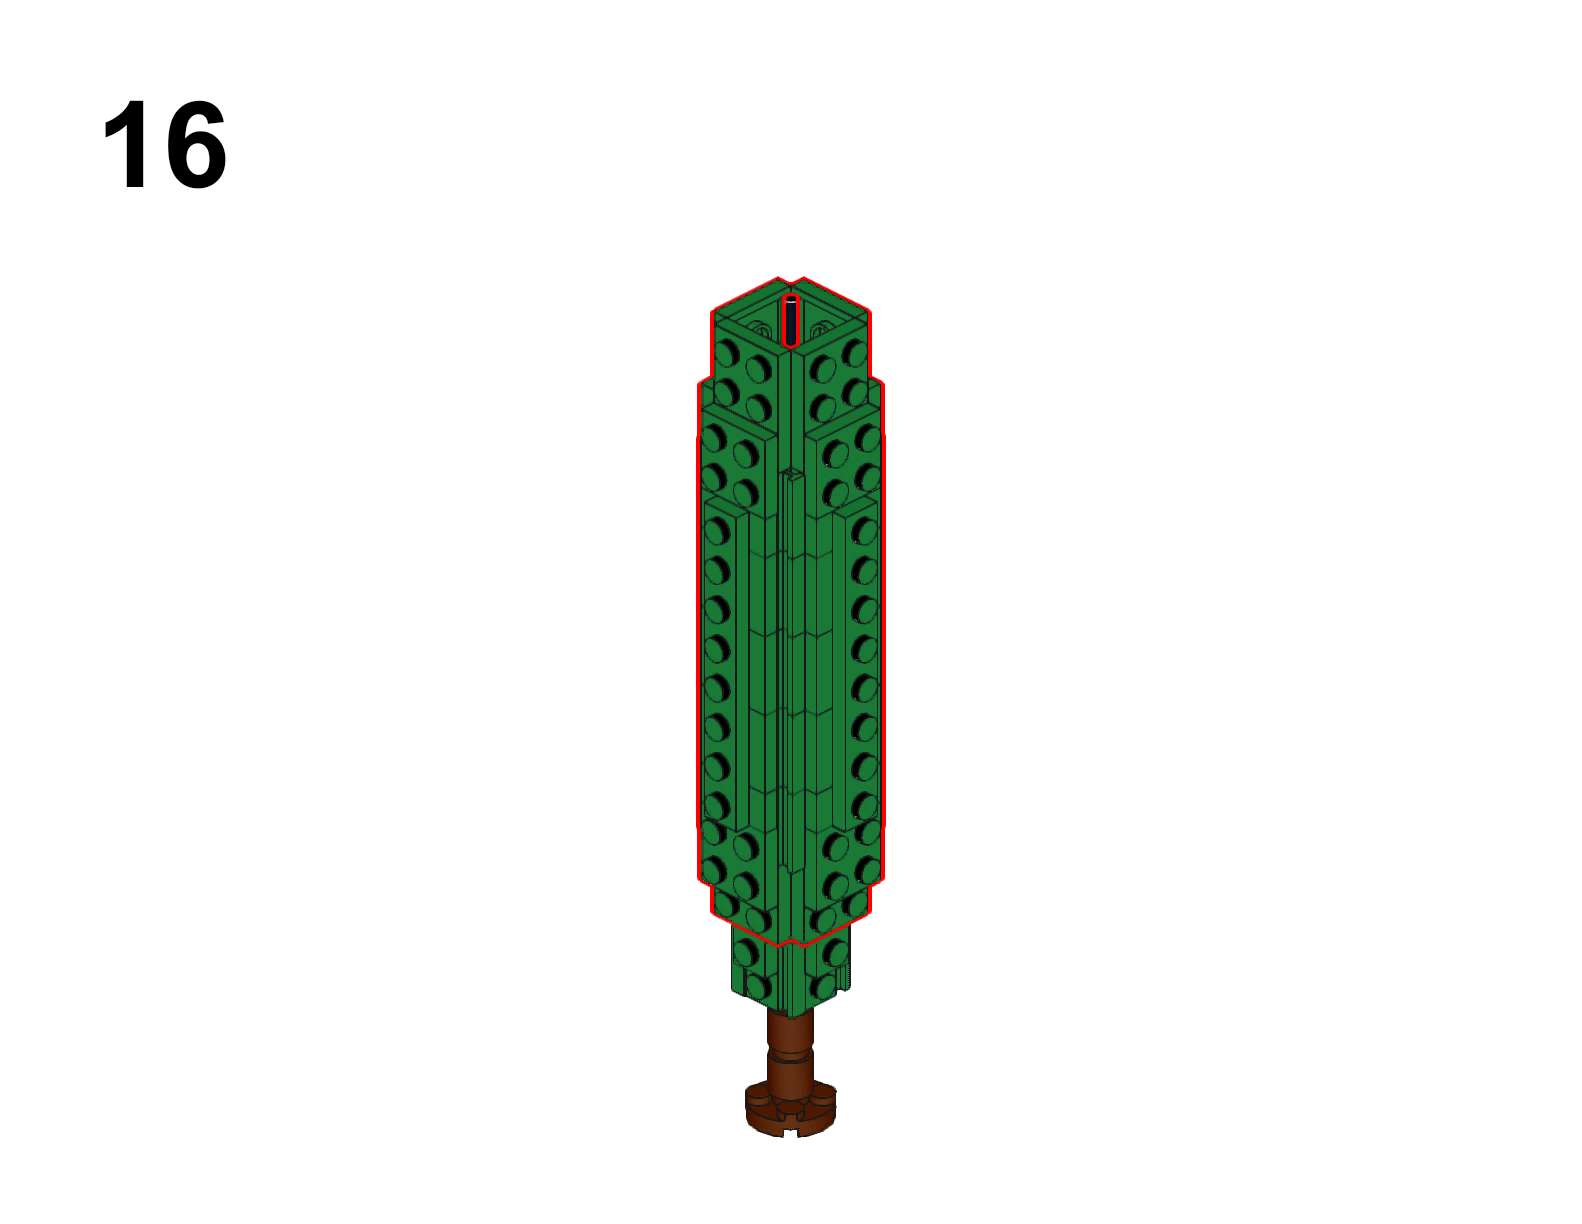
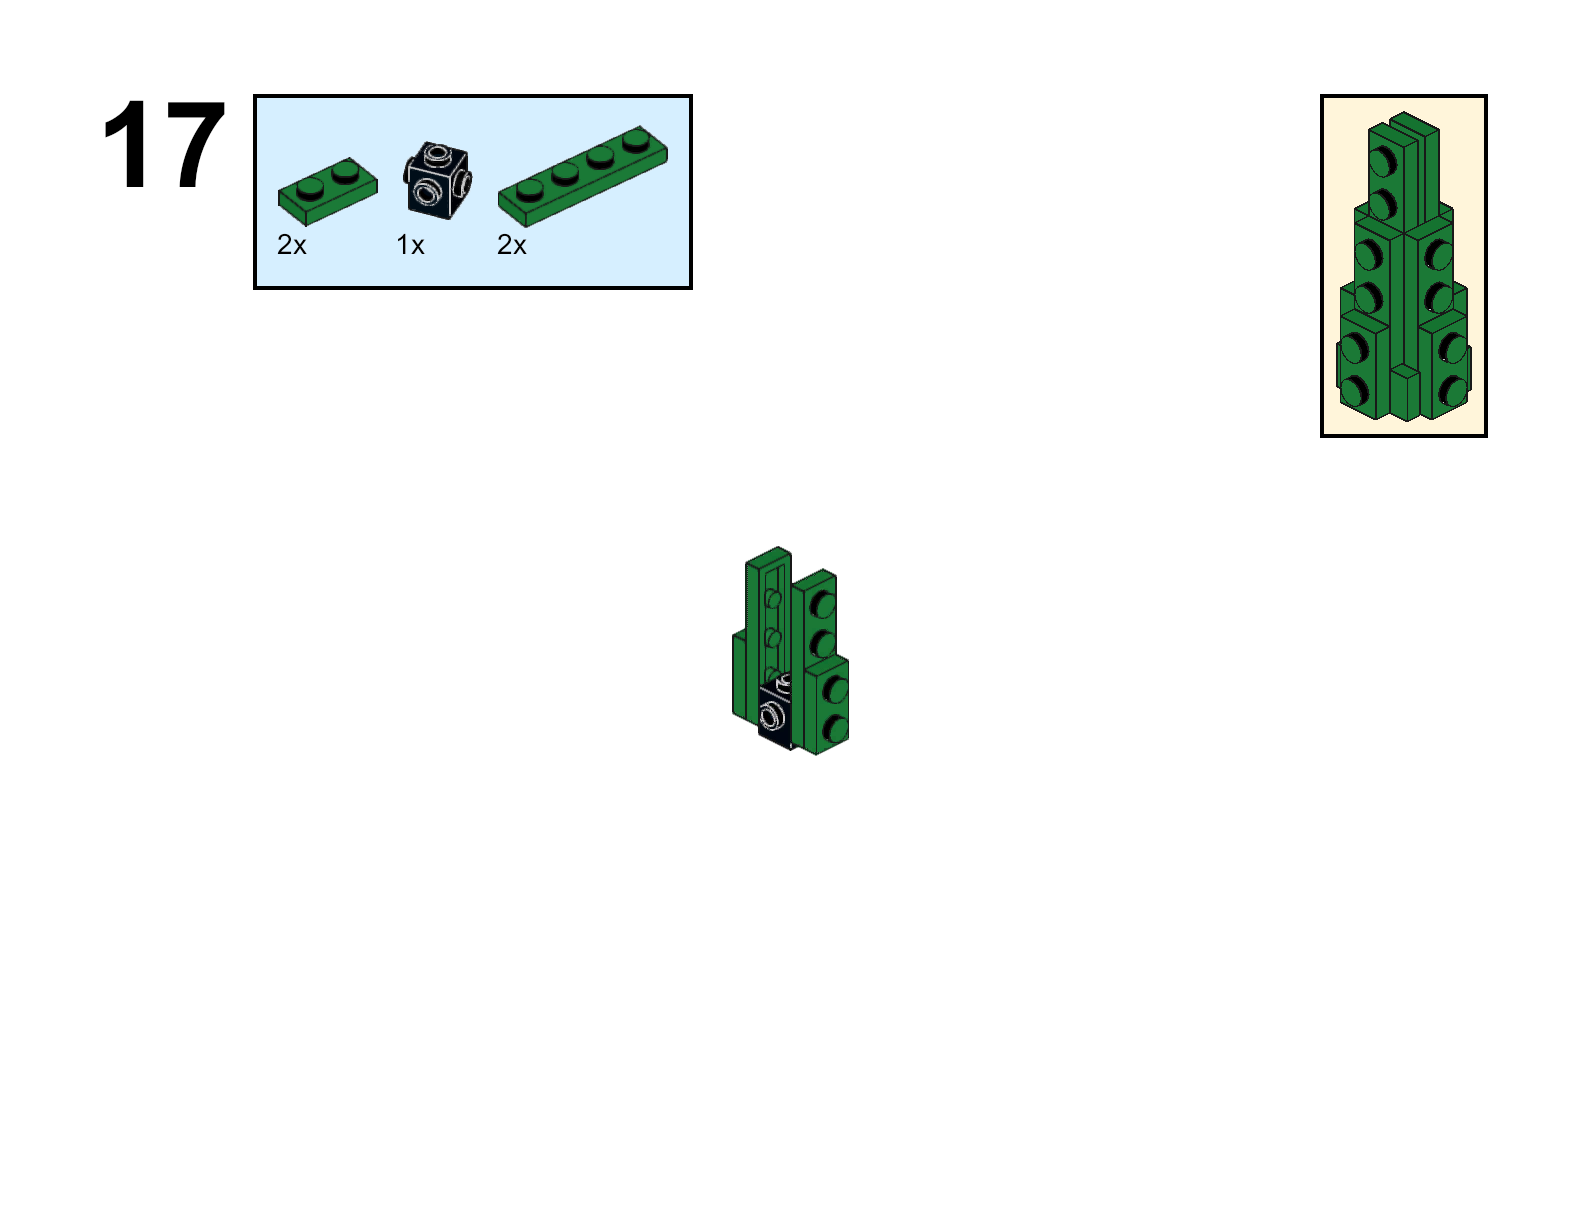
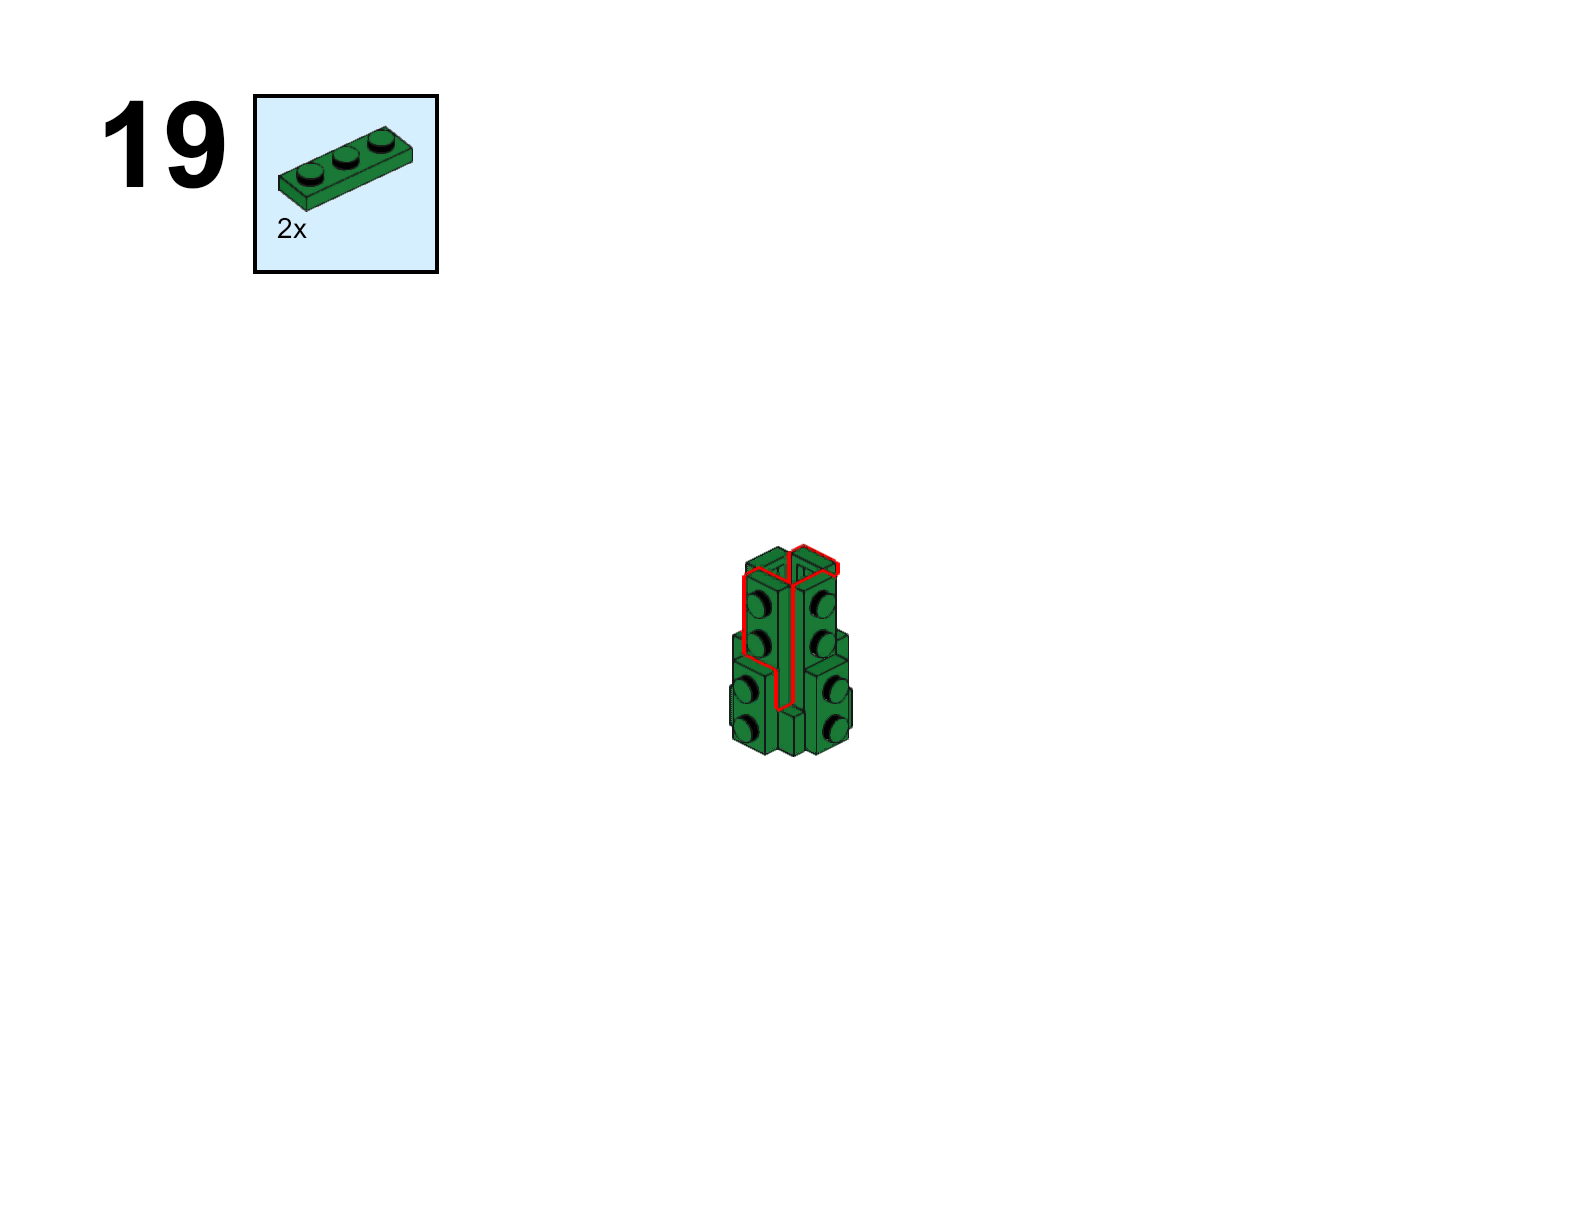
We modified the top of the tree to look a bit more even and we use 3 different heights by shortening the middle section from 10 stud lengths to 8 stud or even 6 stud lengths.
We have lots of different styles of Lego trees in our display. This is one of them that looks great and is fairly durable although it does take a fair number of pieces to make. This tree was created by David Frank (and inspired by Thomas Rafert). The instructions are on flickr at: https://www.flickr.com/photos/fraslund/albums/72157633522859866
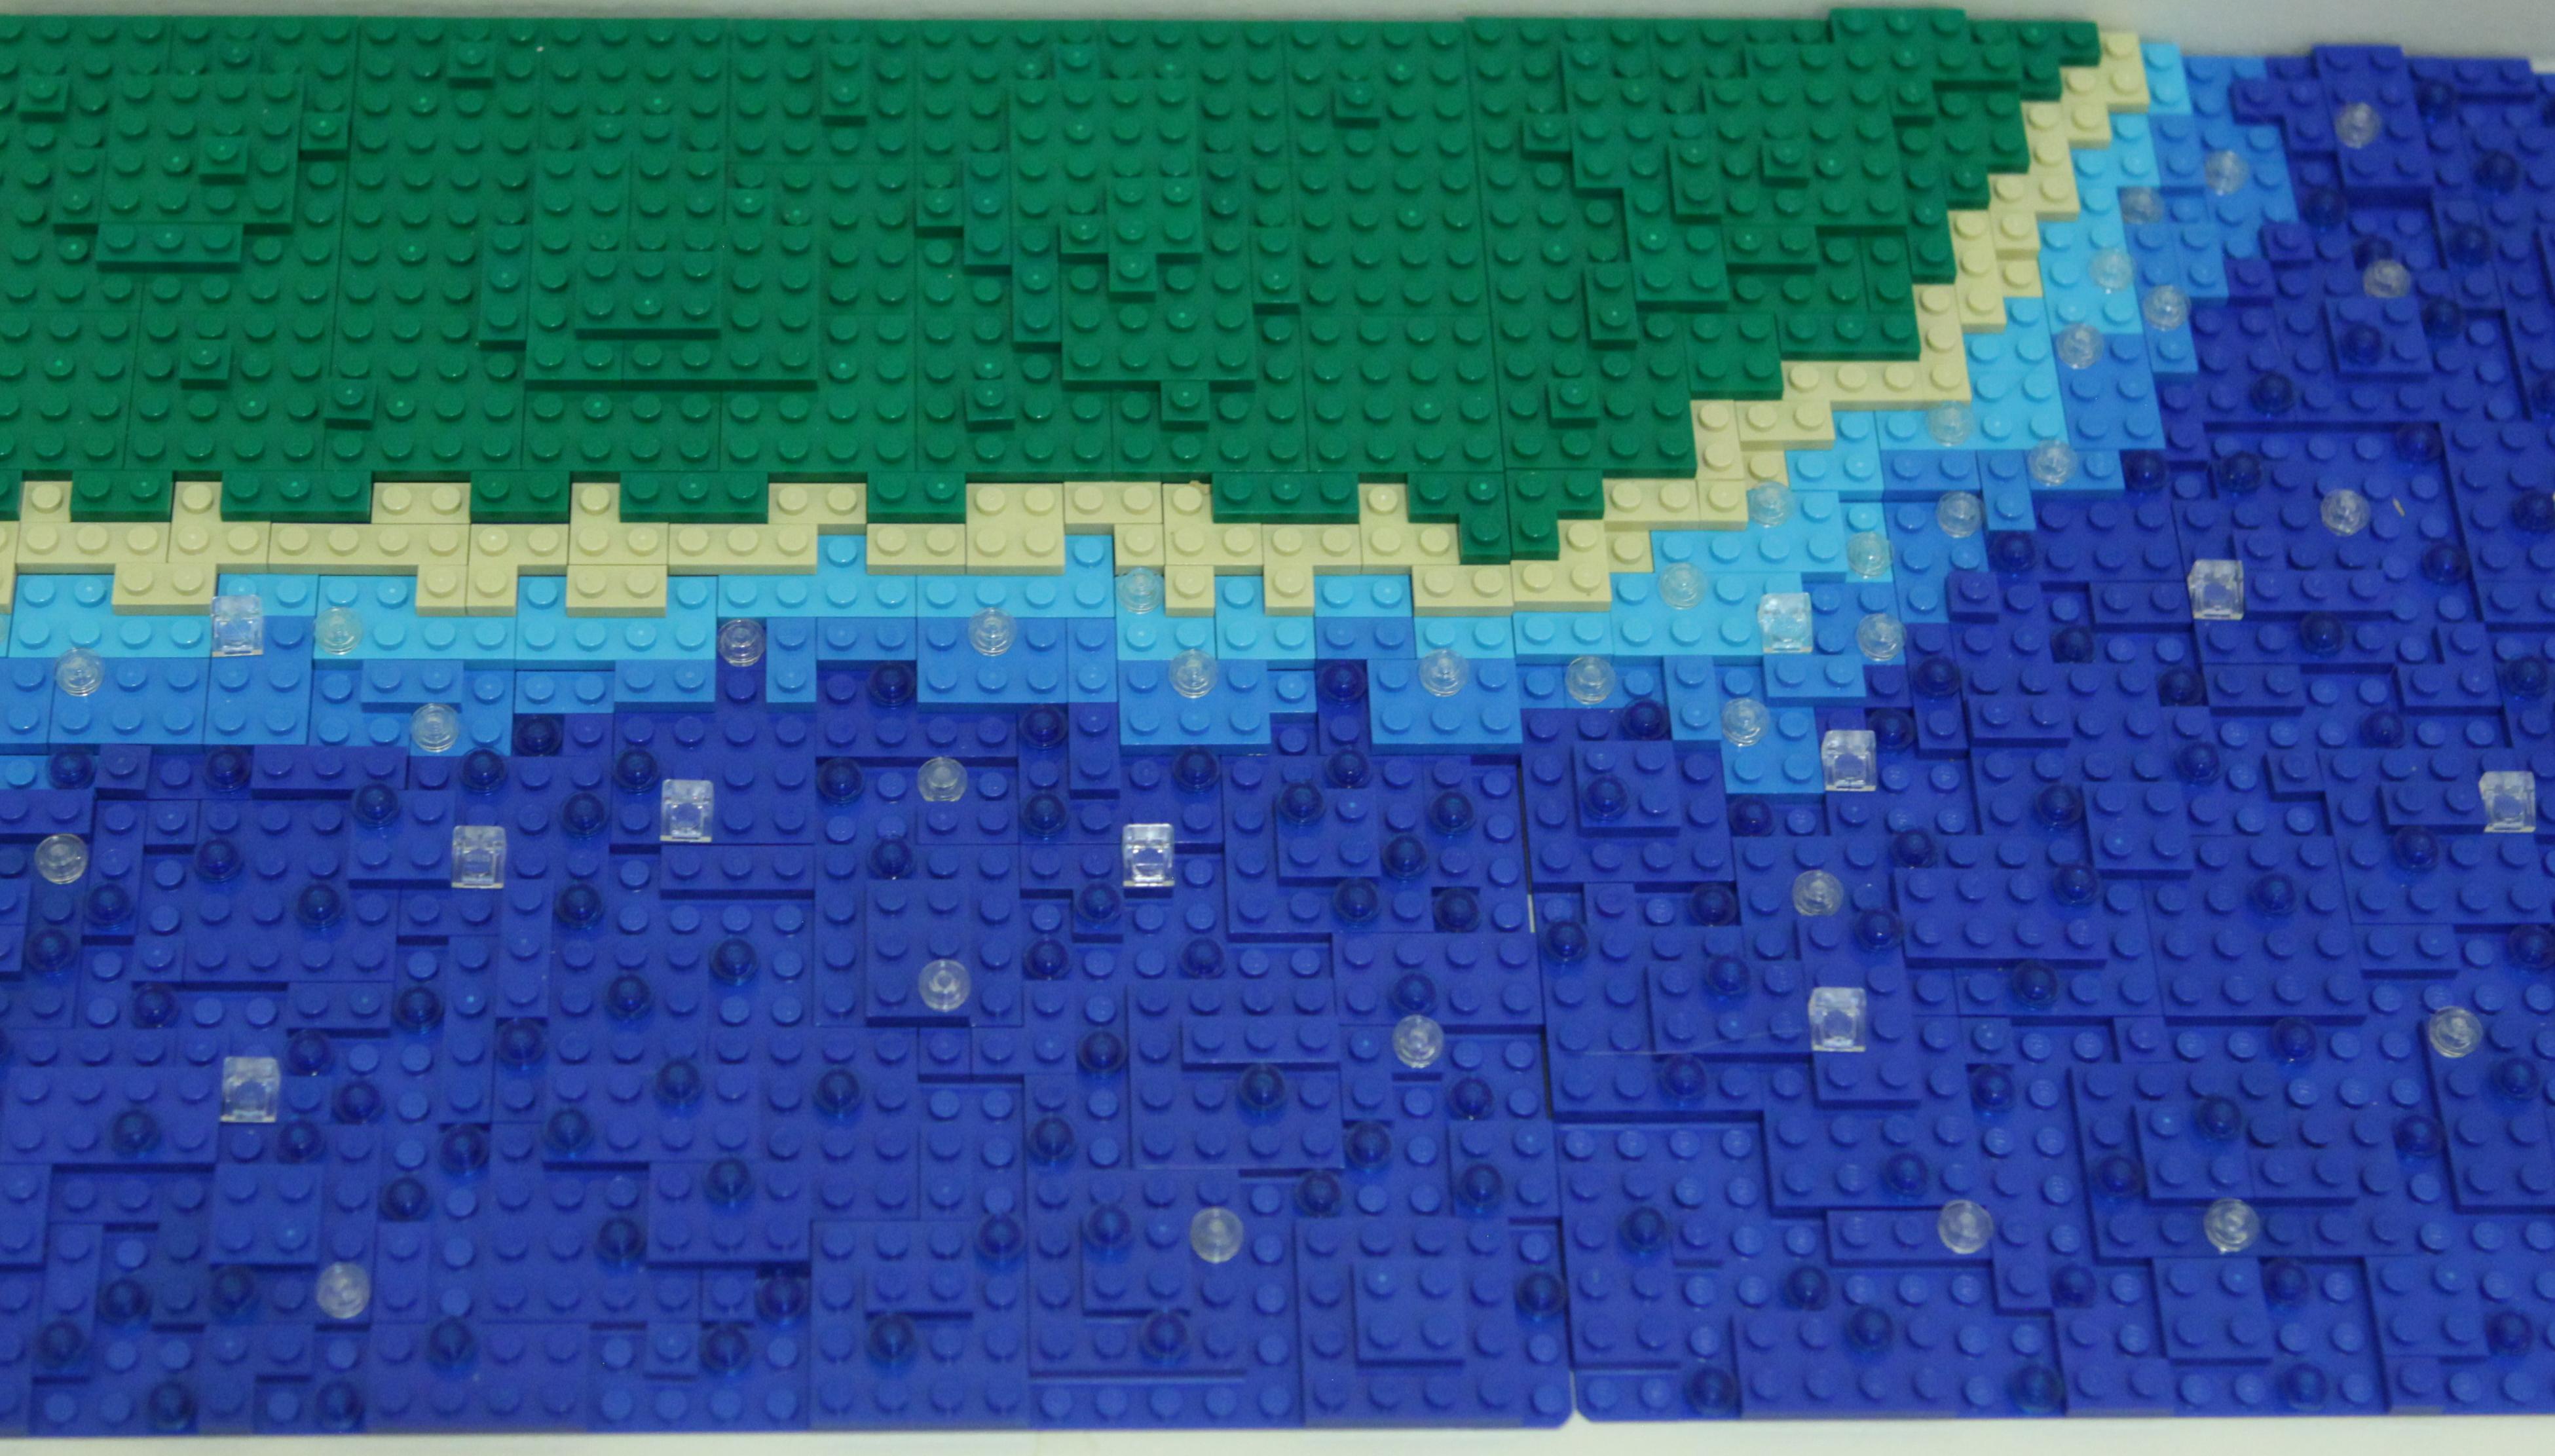
Our ocean standard is designed to meet up with a MILS baseplate and still have some nice texture. Each section should be on a 32×32 baseplate. Here is a high resolution image of 2 sections with standard grass coast with ocean:
Ocean base with one straigth grass coast and one corner grass coast
The ocean itself is blue at three heights, the baseplate level, one plate above and two plates above. The heights should be somewhat random to simulate a rough surface (like the ocean). Above the blue plates, there are trans-blue plate, round 1 x 1’s that are randomly placed at all levels. There are also trans-clear plate, round 1x1s and trans-clear cheese slopes. Although other trans-clear pieces can be substituted for these as long as they blend in reasonably well. If you want to show a rougher ocean area (maybe near some rocks), then add more of the trans-clear pieces.
For coastal areas, there can be multiple types. The most basic coasts are grass, which is shown in the image above and beach. Another common coastal type is rocks, which would use dark gray slopes and more trans-clear pieces at the edge to show more waves.
All of the coastal types should transform from water to land around the midpoint of the 32×32 baseplate at the edges of each section which needs to interface with other sections. For the grass standard, the ocean should have approximately 14 studs and the grass would have about 14 studs and the shallows and beach would be approximately 4 studs. The coast should wander around a bit in the middle part of the section to avoid straight lines. You can design multi-section areas that are designed to be together so all sections don’t have to conform to the interface rules for the coast. However, the interfaces on the outer edges of these multi-section areas should conform to the standard interface rules.
The colors of the standard grass, beach, shallows standard are (all colors are Bricklink colors):
Grass: green at a height of 4 plates
Beach: tan at a height of 3 plates
Shallow 1 (closest to the beach): Medium azure at a height of 2 plates
Shallow 2 (closer to the ocean): Dark Azure at a height of 2 plates
Ocean: Blue at a height of 0 to 2 plates
Minor fluctuations of height, position and accent colors are expected and desired, please make sure it looks good with the generic standard so we can interchange the pieces.
Similar to grass, the beach, shallows standards are:
Beach: tan at a height of 3 and 4 plates (the back part of the beach should mostly be at 4 plates high since it’s designed to be next to a tan MILS piece.
Shallow 1 (closest to the beach): Medium azure at a height of 2 plates
Shallow 2 (closer to the ocean): Dark Azure at a height of 2 plates
Ocean: Blue at a height of 0 to 2 plates
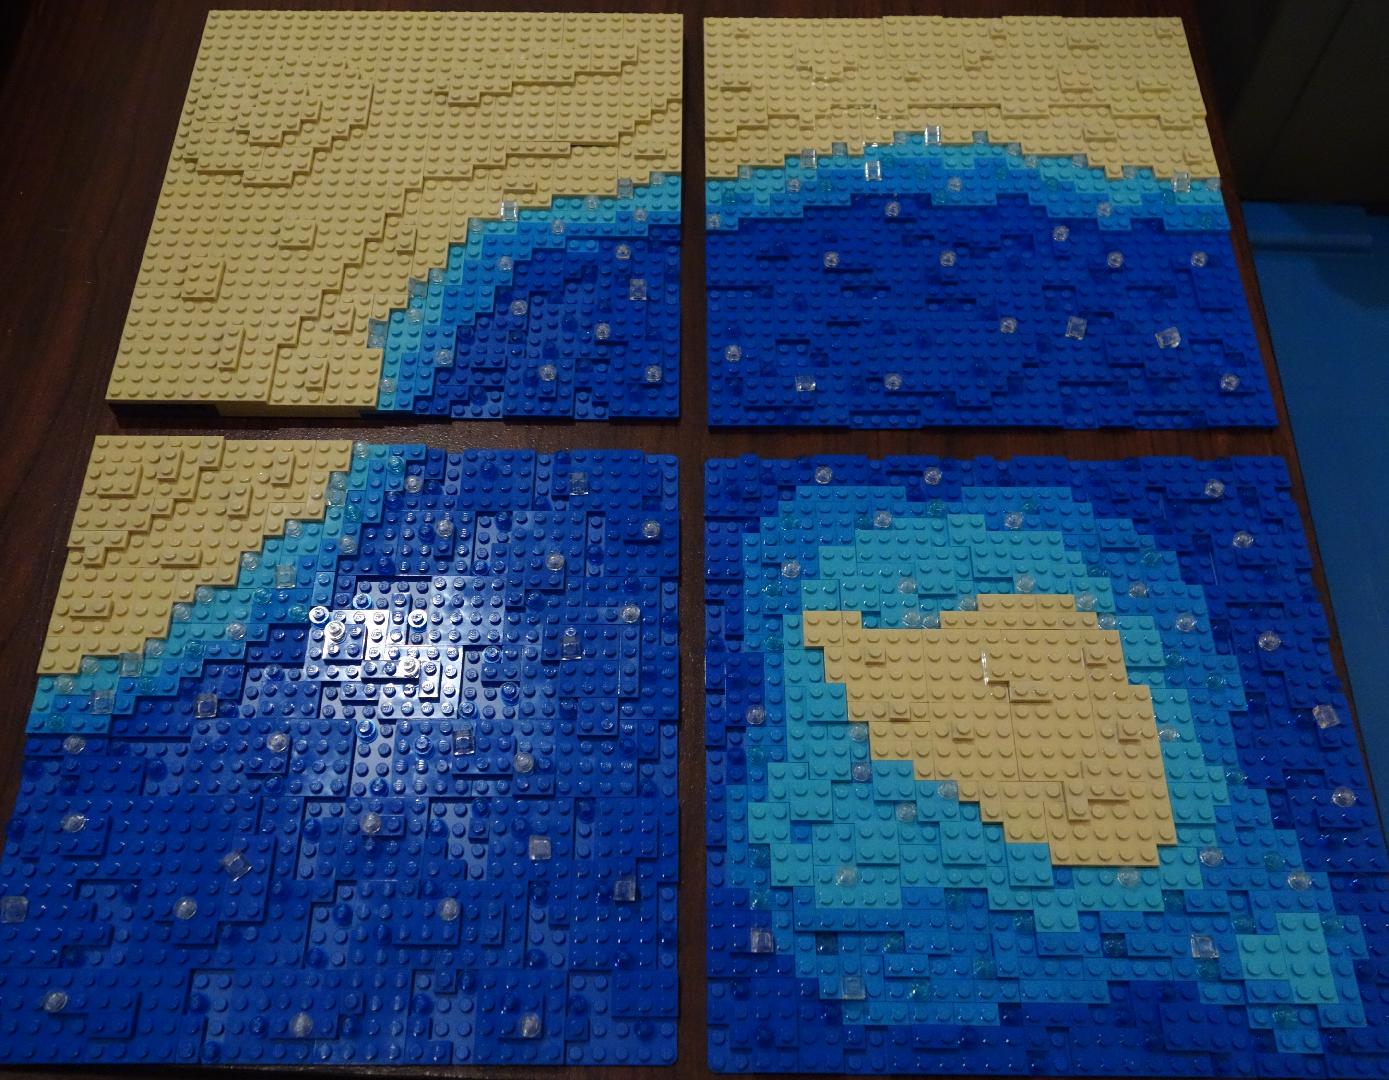
The beach transition should be near the middle of the baseplate (between the 16th and 17th stud) so it will line up with the piece next to it. However, it is expected to fluctuate +- a stud or two to avoid straight lines. Here are 4 examples of a beach coast (a straight beach, an inner curve beach, an outer curve beach and an island):
Example of the beach standard with our ocean standard
With all four put together, the scene looks like:
Example of the beach standard with our ocean standard
These are instructions for a good looking, relatively easy to build, tree.
This standard allows a large number of people to participate in our group builds and allows for a lot of flexibility in how we layout our landscaping scenes. Here is an useful source that offers various tips and tricks for successful landscaping. At first, we are concentrating on basic level ground modules with pathways and rivers but as we build up more available pieces, I’m sure we’ll have more of the mountains and/or coastal areas.
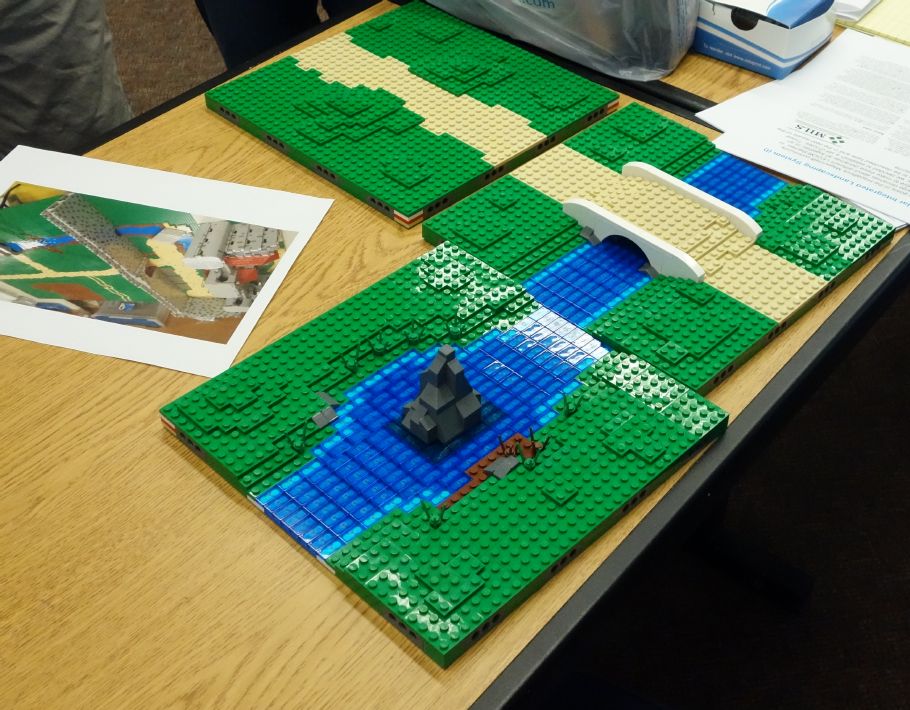
Here are a couple pictures of several sections club members have already built.
MILS landscape examples by Corey
This shows how 2 modules built by different people can be combined and still look like they belong together even though the detail styles are a bit different.
MILS standard working (contributions from 2 different club members)
Our first major goal for MILS is for a castle-theme battle scene with a large number of landscape pieces in front of the castle’s curtain wall. We also will most likely have a CCC standard that is combined with MILS, similar to the following picture:
MILS and CCC standard by Nate
Instructions for basic modules
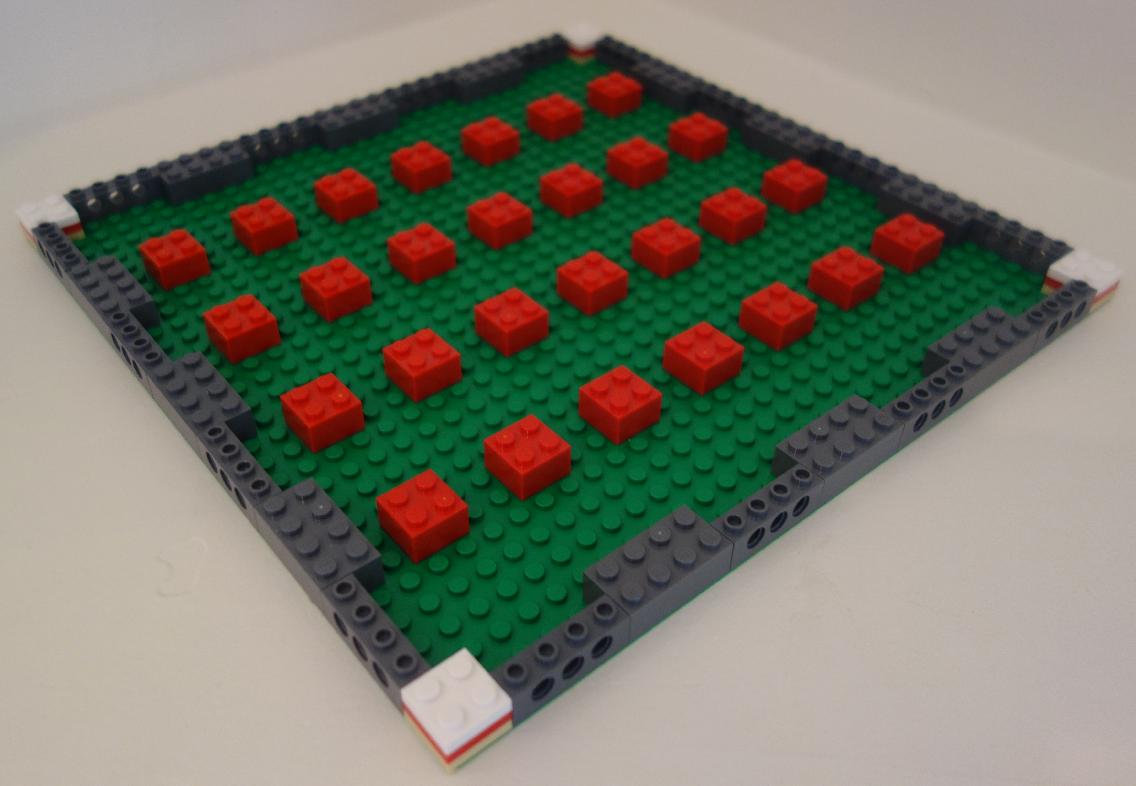
For the basic green module, the standard MILS is just a 32×32 baseplate with a layer of bricks plus a layer of plates. Here’s a series of pictures to show one of the simplier ways of building these modules.
The first layer of brick needs the technic, brick 1 x 4’s on the corners (2 studs off of the edge). I’ve added additional technic bricks at the center locations as well which is not required:
MILS standard – green flat step 1
The 2×2 in the corners is the country code for the builder. This should be unique within our group so we can identify who owns each piece. (a label on the bottom of the baseplate works just as well). Notice that I’ve used random colored 2×2 bricks in a pattern in the center. For this module, I’m going to use Green plate 6x8s because I have some (You can use whatever plates you have which will change how the supporting bricks are placed). To support the plate on top, you should have a brick under it on all four corners. In this case, I’ve added another brick to help support the middle of the plate since without it, the plate bends a little more than I like. I used Dark Bluish Gray for the sides but there is no real reason to do so. If the module is going to be on the overall edge of our display, it must have the top color (in this case, green) on the sides. For quick display, we don’t always have that and I’ve noticed Dark Bluish Gray blends in fairly well and is not that noticable.
In the next step, I started placing the 6×8 plates. I had to add 2 rows of 1x8s on two of the edges to make everything add up to 32 studs.
MILS standard – green flat step 2
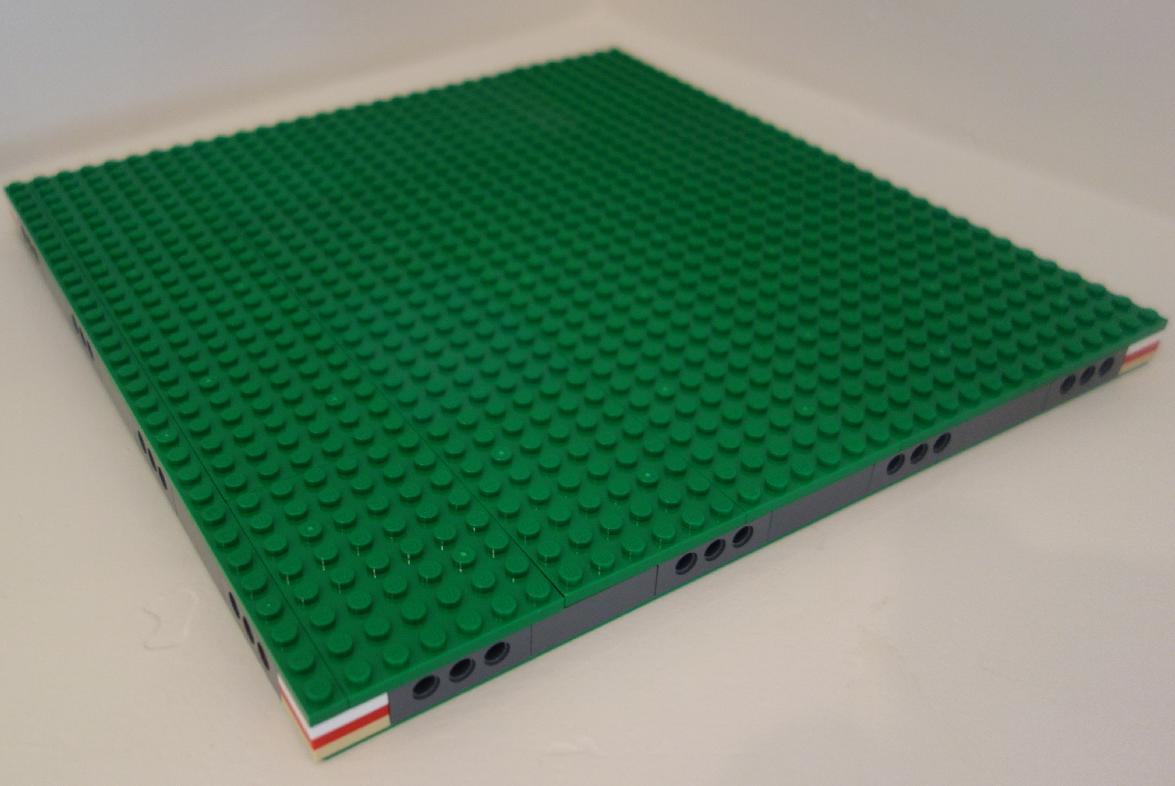
Once the layer of green plates are placed, you have the following:
MILS standard – green flat step 3
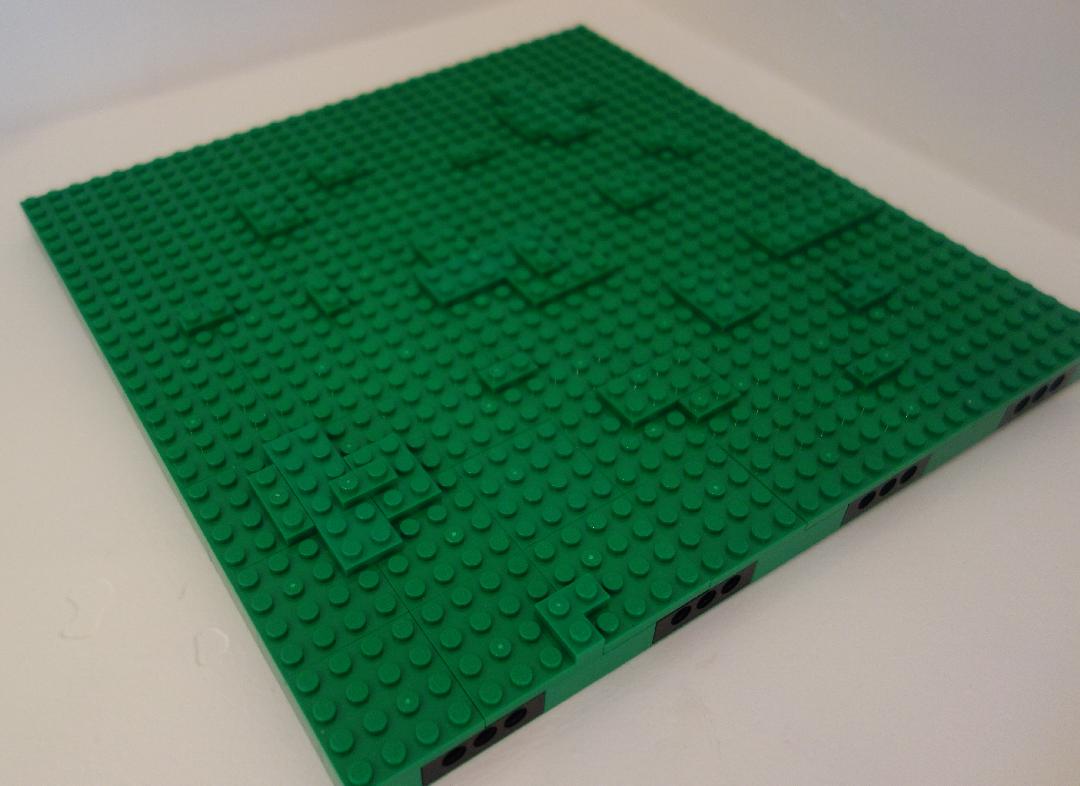
This is not quite ready for a display (although we have used this in the past), we generally want some randomness on the piece. The simpliest is to add some plates across the piece like this:
MILS standard – green flat step 4
This looks a bit plain (and it is) but remember that we generally will add trees, people, carts, horses, etc on top of this. For more fancy pieces, adding rocks or mud or a hill would add a lot to the piece but remember that the edges must be able to look normal when placed against another green MILS piece so you don’t want your custom feature to require something on the piece next to it.
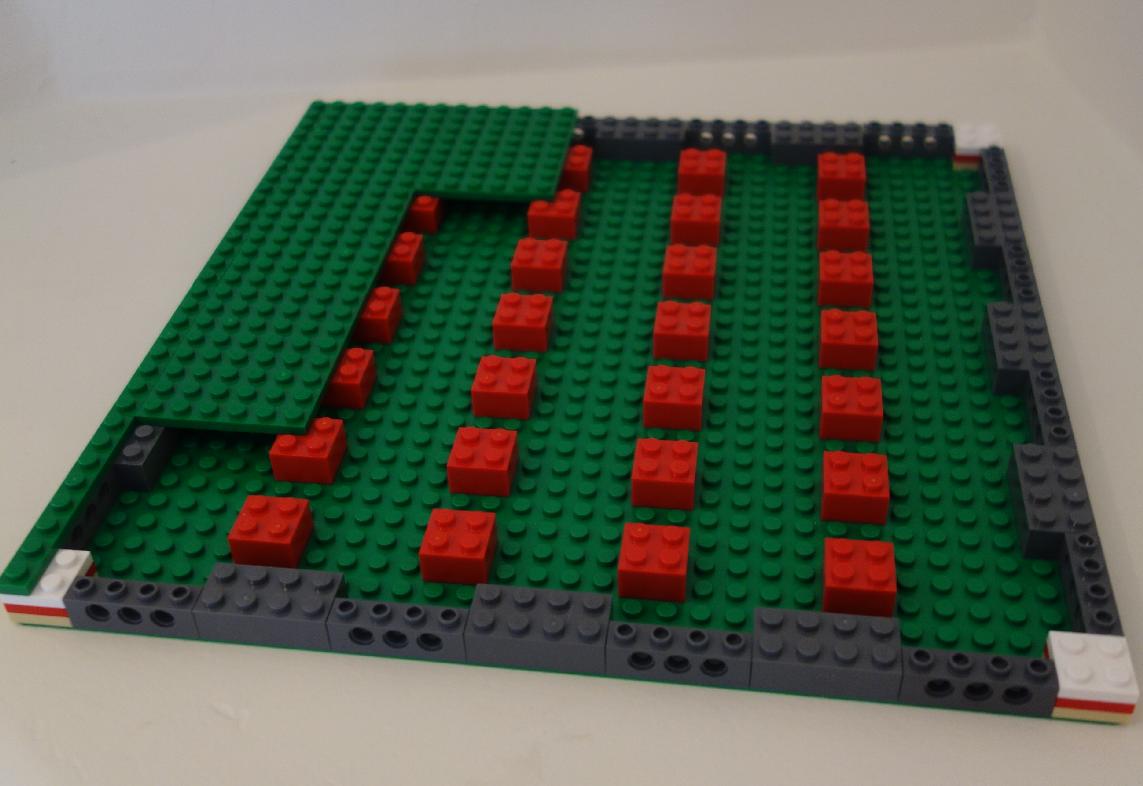
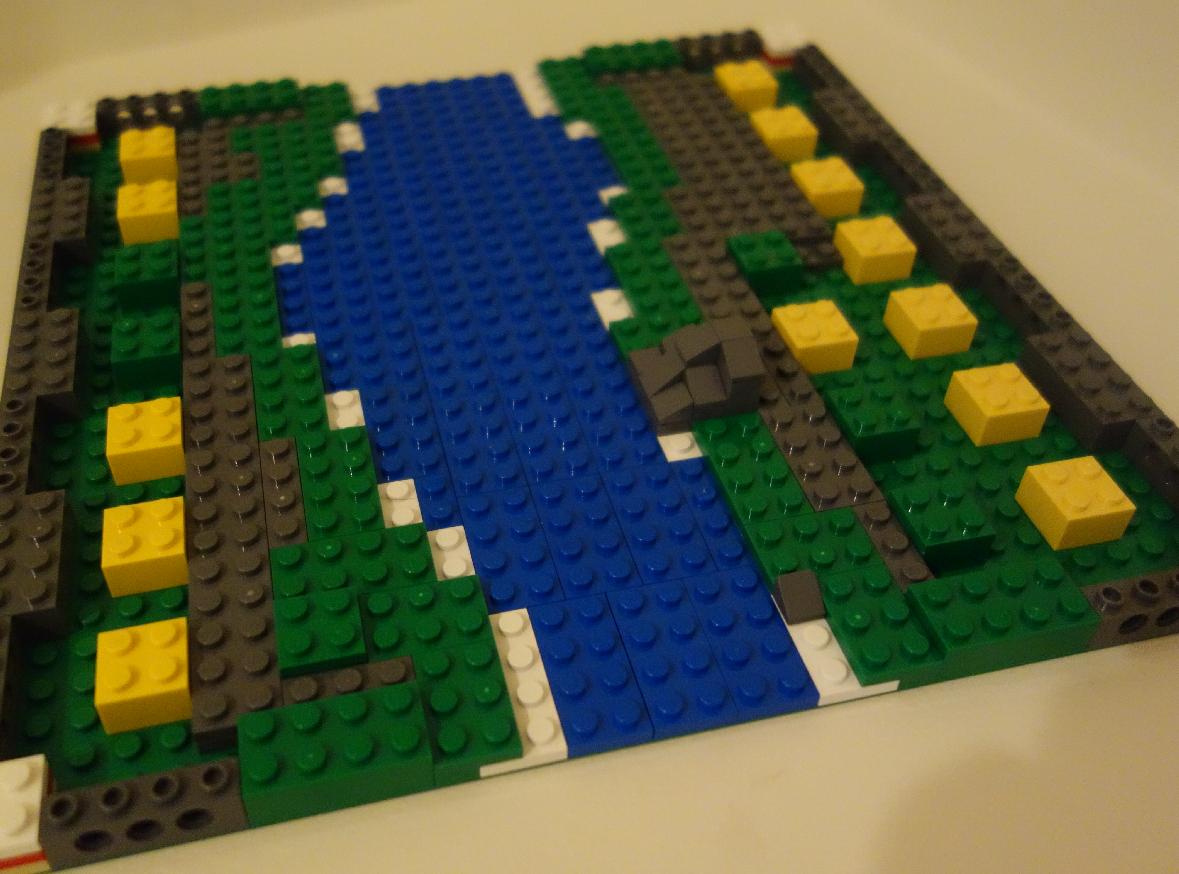
For the basic straight river module, the river is below the “surface” of the standard MILS module. The surface of the river is a Trans-Dark Blue tile on a blue plate which is directly on the baseplate. That means, it’s 2 plates lower than the rest of the module. This forces the supports to be removed where the river is. Here’s a series of pictures to show a farely simple straight river:
MILS River – Step 1
The first step in a river module is to determine where the river is. Place blue plates throughout the river with 1 row of white plate on the edges. The white plate can be missing at some locations, but it should look “normal” if the module adjacent does have the white plate. For the sections that are away from the river, place the supporting 2×2 bricks. For the bricks close to the river, use green brick because some of those may be visible depending on how quick the slope rises from the river.
MILS River – Step 2
For the second step, place plates around the white plates. These can be filler color since none of these will be visible.
MILS River – Step 3
For the third step, start placing the “slope” along the edges of the river. Notice, I cover some of the white plate and some I leave around. For this step, it would probably be a good idea to add rocks or random bits around the river (white water rapids or mud or whatever you like near a river).
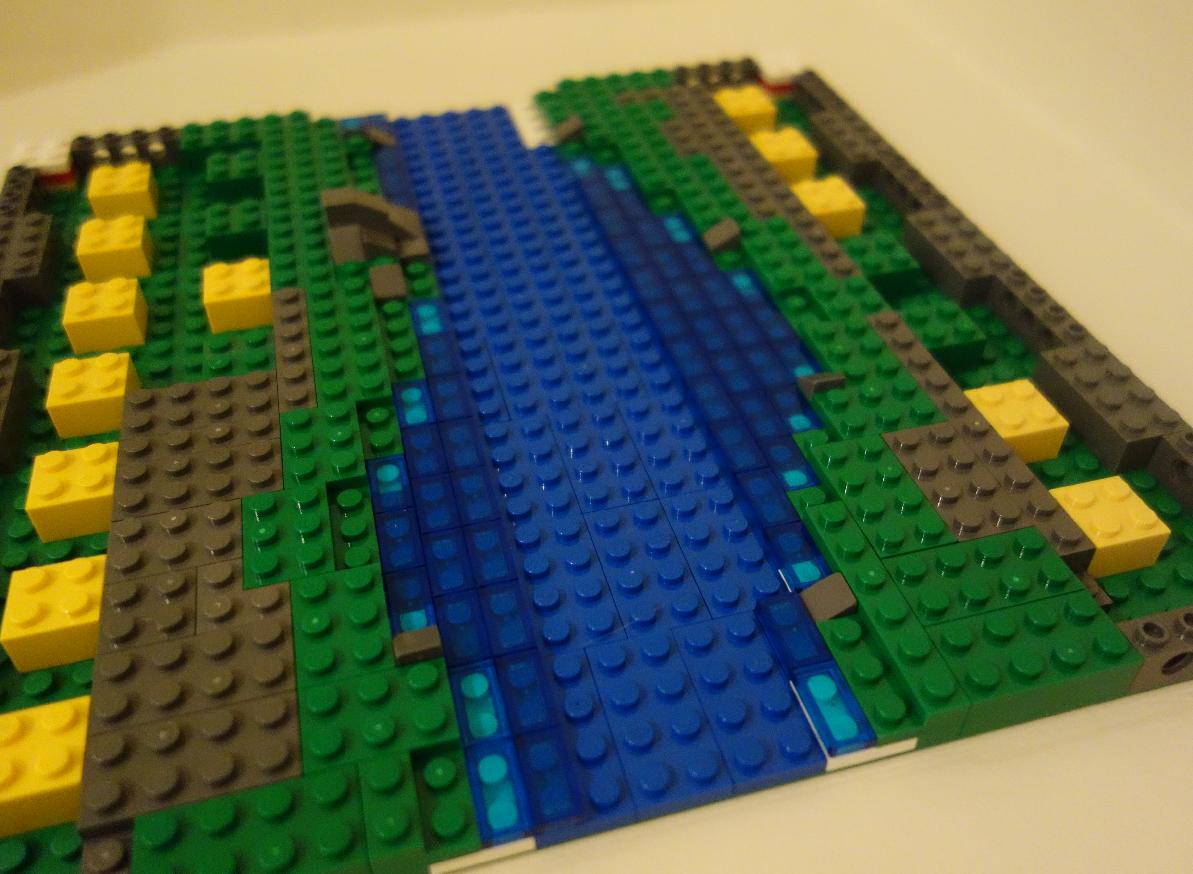
MILS River – Step 4
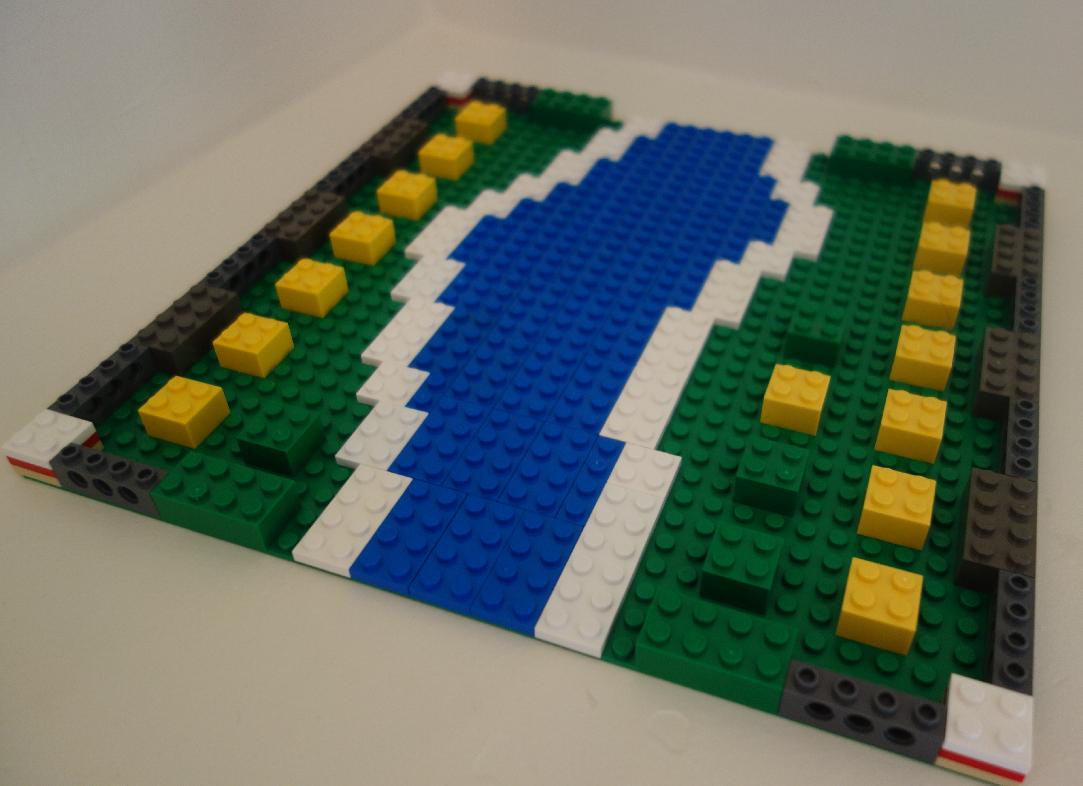
For the forth step, continue to add to the slope of the river. This raises the top level up to the same level as a brick.
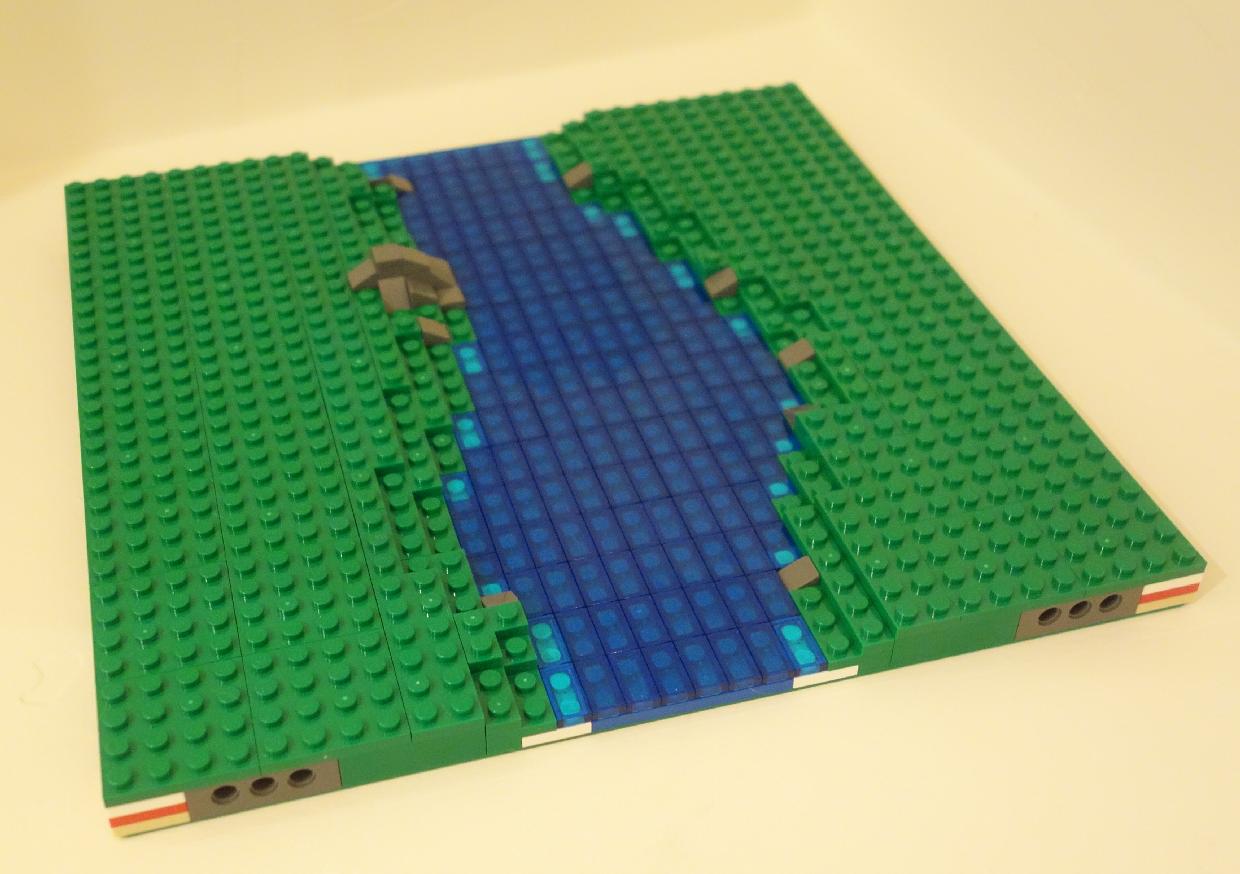
MILS River – Step 5
For the fifth step, place the top level “grass” around the non-river sections. Also, at this time, you’ll want to add any features you want to the grass.
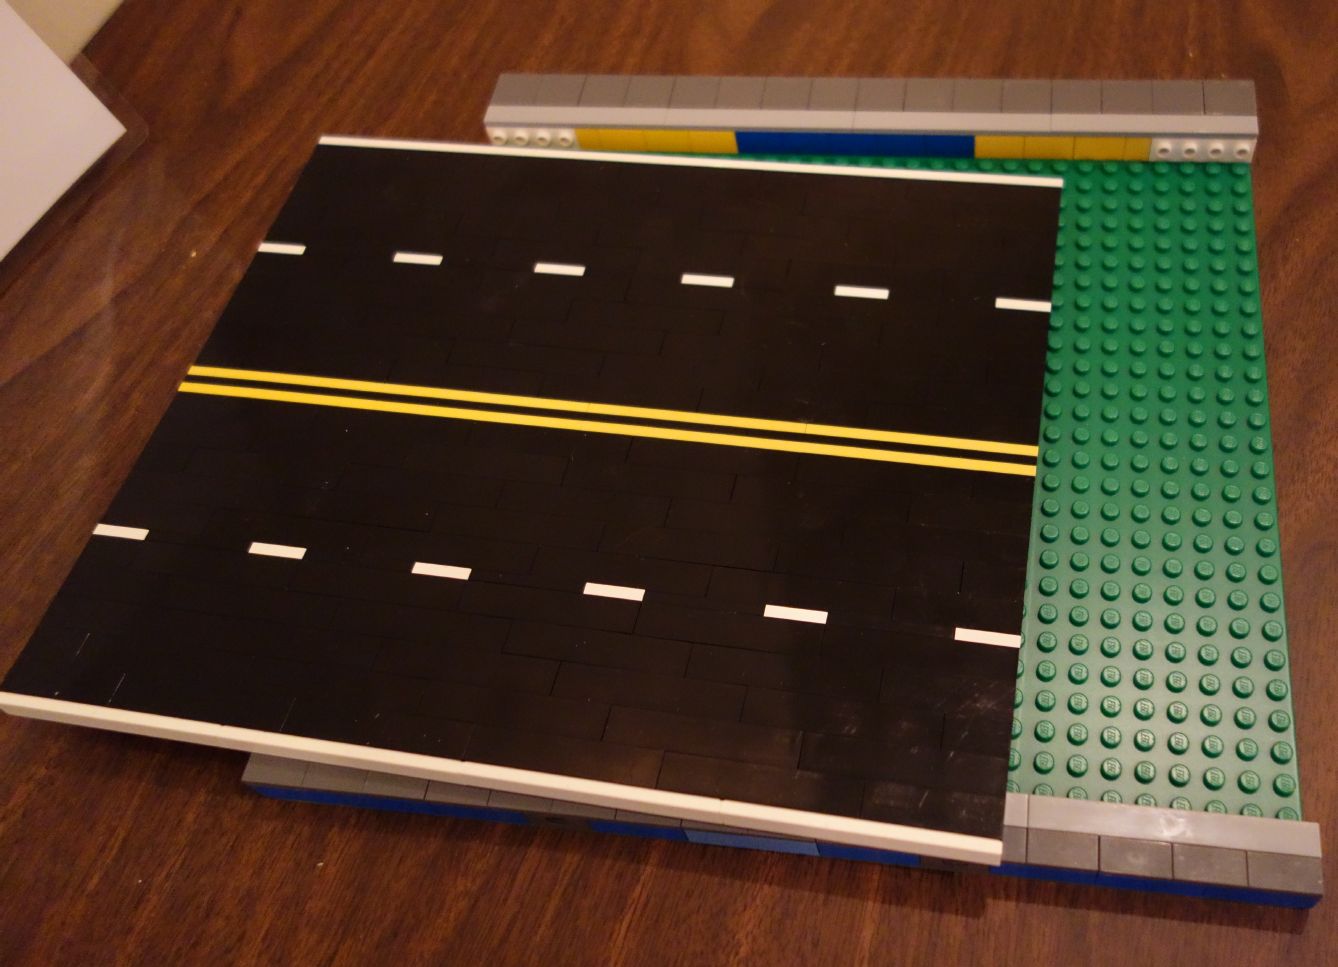
CactusBrick has a standard minifig scale city road module. This allows for multiple club members to add to our city/train layout. The standard is built onto of a 32×32 baseplate. The road section itself is 32 studs wide laying on the side between sidewalks on each edge. Here’s a picture of a basic road section:
City Road Module
The road section itself going from bottom to top is a full white plate layer, 5 black bricks, a striped white/black plate layer (2 studs white, 4 studs black, repeat), 5 black bricks, a yellow plate, a black plate, another yellow plate, 5 black bricks, a striped white/black plate layer (same pattern as previous striped layer), 5 black bricks and a layer of white tile for the top.
The sidewalk is 2 studs wide on one side and 3 studs wide on the other. The sidewalk is build with layer of brick on top of the baseplate with a layer of tile on top of the brick. The outer edge of the sidewalk has the standard Technic Brick with Hole at the 10th and 11th stud location from both edges.
City Road Module Edge
The edge of the sidewalk (next to the road) is Light Bluish Gray tile for both sides of the road with Dark Bluish Gray tile for the remaining sidewalk. Depending on what’s next to the road, green bricks/plates are allowed for the sidewalk as well as the entire sidewalk being Light Bluish Gray if the building next to it has Light Bluish Gray sidewalks. Optional features of the road include the studs on the side in the 3 stud wide sidewalk section to hold the road and a technic brick on the side of the road to line up with other roads. Also, there are 3-way and 4-way intersections as well as curves. The most basic additional feature is a crosswalk for some of the roads.
The 16×16 module (or quarter block) is the smallest module but we have 32×32 modules (a full block) and even a multi block module that we have shown at events. The key is for the sidewalks and roads to line up with it’s neighbors. We use the standard White Tile 1 x 2 for sidewalk.
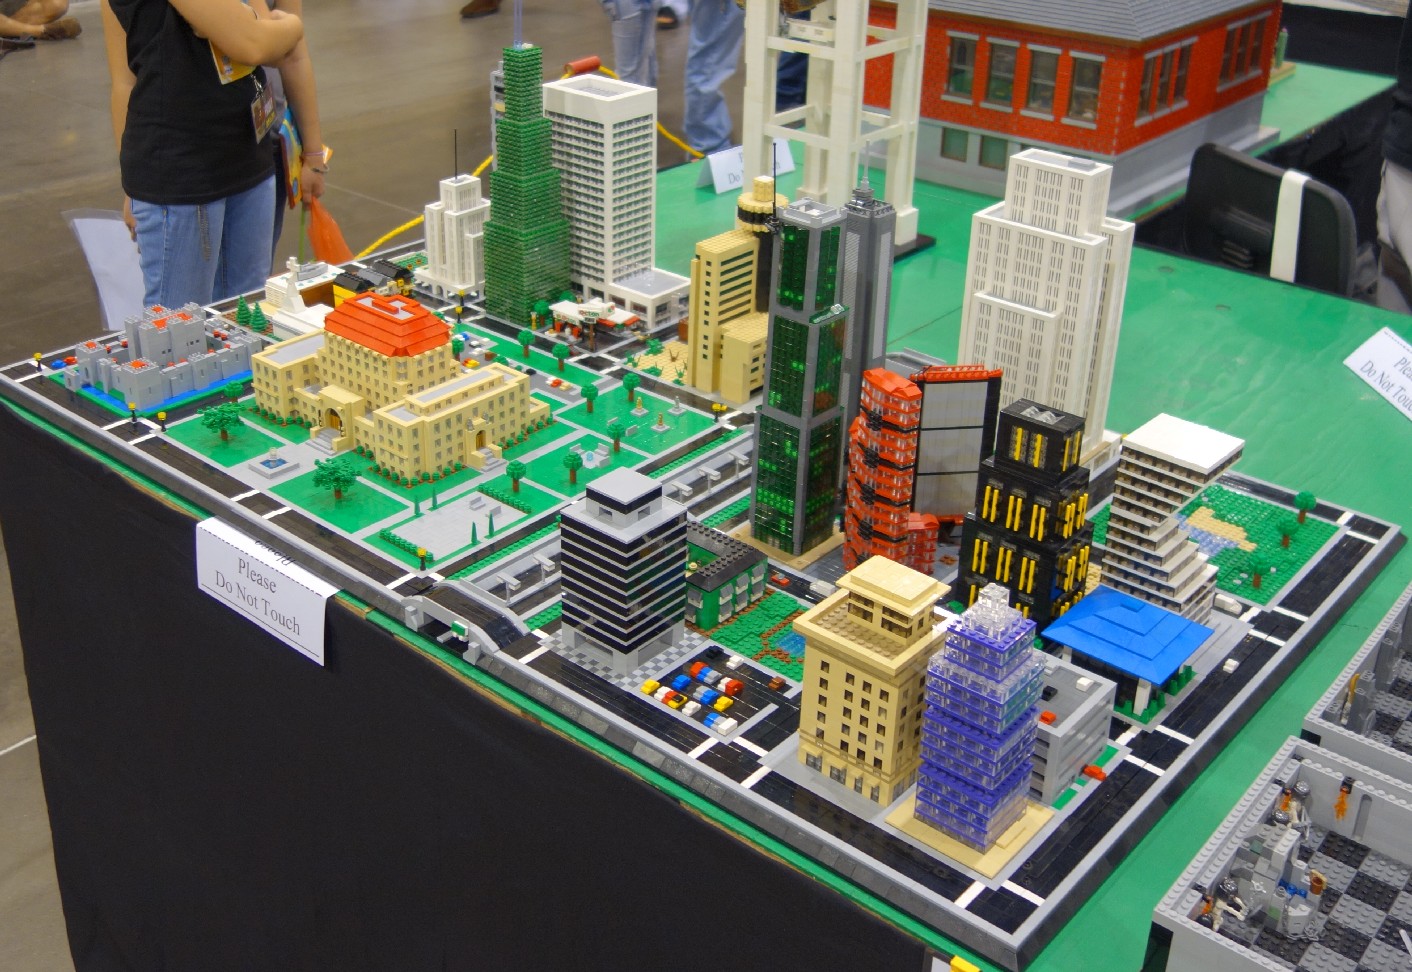
Here is our microcity display shown at Phx Comicon 2014:
Micro City by Corey, Stephanie, Josh, Steve N and Clark.
We also have edging so the sides of the modules are not seen (most of the siding is using filler brick so it generally doesn’t look very good):
Micro City edging
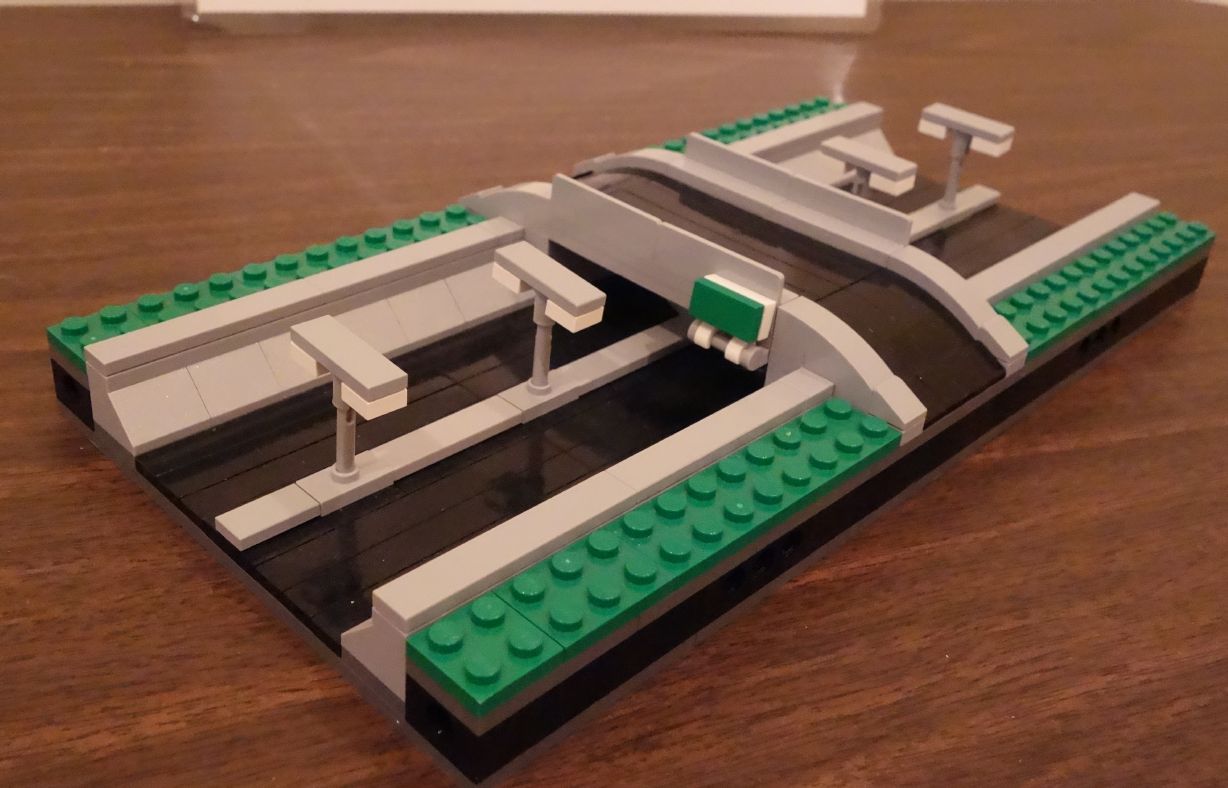
One club member has built a freeway for the micro city:
Micro City Freeway
Other ideas for similar features are rivers or canals, expanded/wider roads, light rail or train, and elevated trains. The only catch is it needs to be integrated with the rest of the micro city. So, in general, these non standard width elements must go from one edge of the layout to the other edge. For example, the freeway goes completely through the layout with special pieces to form up to the edging for both sides.
The CactusBrick minifig city layout standard is basically the Cafe Corner standard with 3 changes.
The sidewalk is raised by 1 brick. So, the bottom is a baseplate with a brick on top of that and then tile on top to make the sidewalk.
There are technic bricks in the front (under the sidewalk) at the 10th and 11th studs from each side. At minimum, this needs to be a “Technic, Brick 1 x 2 with Hole”, but it can be longer as long as the center hole exists.
The sidewalk is 2 or 3 studs less deep. The road baseplate in front includes either 2 studs or 3 studs wide sidewalk. The edge is Dark Bluish Gray so the module should plan on being next to Dark Bluish Gray tile.
Based on the Cafe Corner standard, the sides (and the back) should also have the Technic Brick with Hole at the 10th and 11th stud location from both edges. The height of each floor of the building is recommended to be 9 or 10 bricks tall but the standard is flexible.
The standard size of each module is 32×32. A 16×32 (where the 16 is the width of the front) is possible, but there are not very many of these in the club so it would be wise to have 2 if you want 16×32 modules.