Cactus Brick will have a display of holiday themed creations on display at the Tempe Museum from December 9th until January 7th. Come and check it out!
The museum is located at 809 E. Southern Avenue Tempe, Arizona 85282.
Cactus Brick will have a display of holiday themed creations on display at the Tempe Museum from December 9th until January 7th. Come and check it out!
The museum is located at 809 E. Southern Avenue Tempe, Arizona 85282.
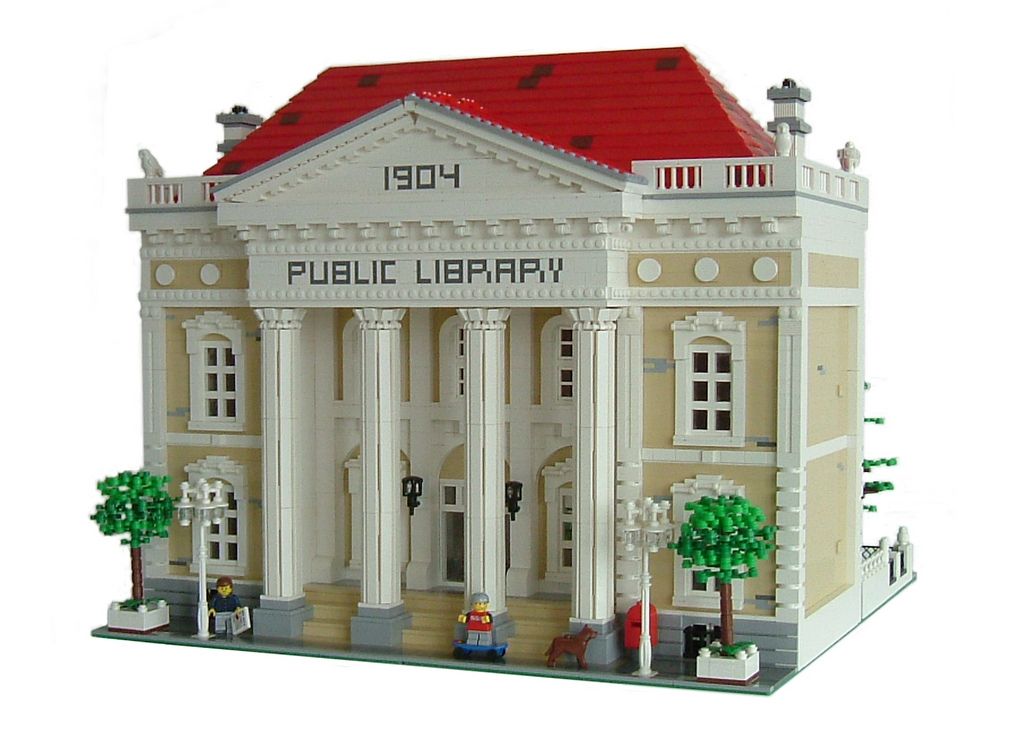
This is a truly amazing Public Library built by Johan van den Heuvel. I think my favorite part are the pillars in the front. What do you think about this building?
Lake Merwin Camper”s Hideaway is located in Washington, with Mt. St. Helens in clear view. The house is a model of a mobile home near the lake. There are some unfinished details but, for the purpose of this model, the main feature is the house itself. This lovely little wood abode is two stories, one bedroom, one bath and a kitchen as well. The deck is quite large. Hammock is shown on the deck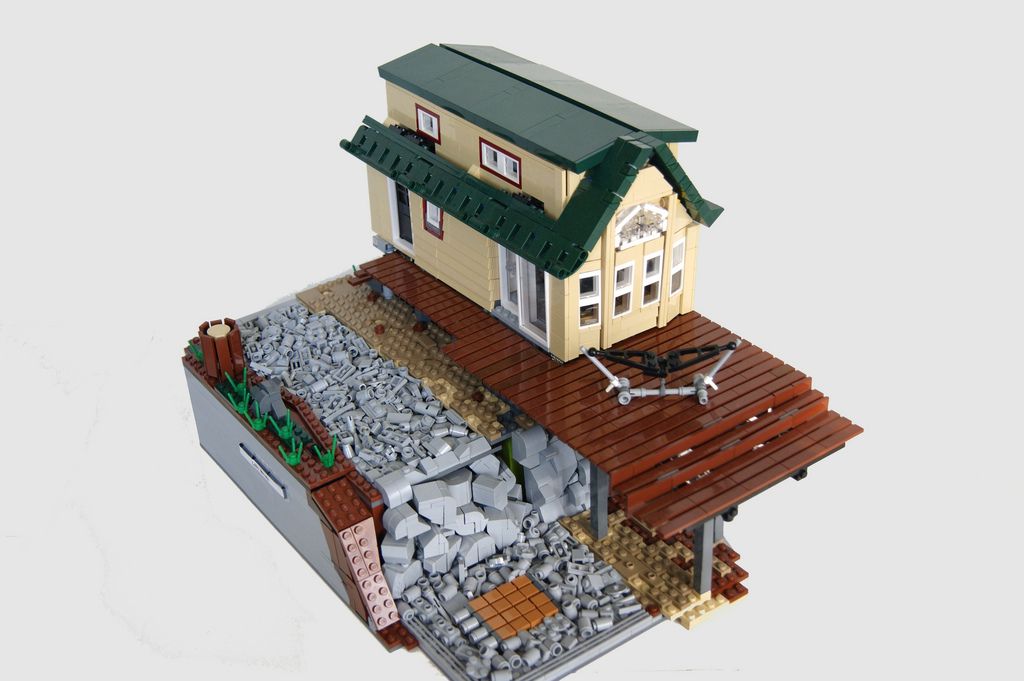
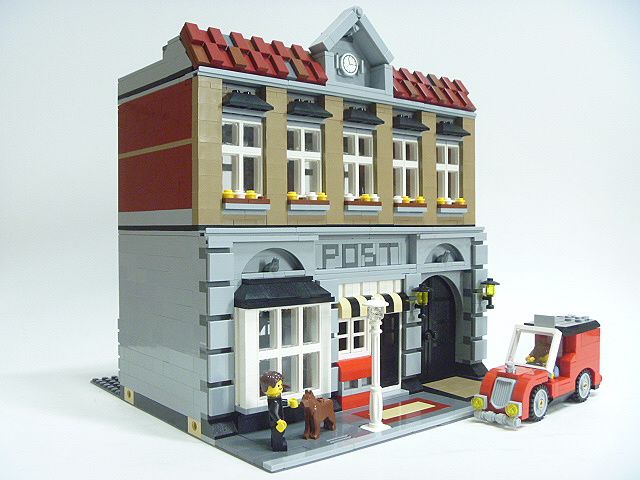
Here is a Great Model Built by Mugen. Absolutely Love the Idea of a Post Office in the Cafe Corner family of buildings, Lets just hope that this MOC Inspires lego to make the next building a Post office. Lets see what alternate MOCs you can make out of this set, Use only the pieces from 10197 and email me the photos and I will post the best one up on this site.
![]() Cactus Brick will be displaying a 15 foot by 15 foot display of custom LEGO creations at the Phoenix Comicon May 26th to May 29th. The display will include a town with over 50 square feet of towering buildings and speeding locomotives. In addition, the display will contain static models from all genres of science fiction and comics. Comicon is open to the public and kids twelve and under are free with a paying adult. To learn more please visit the Phoenix Comicon website.
Cactus Brick will be displaying a 15 foot by 15 foot display of custom LEGO creations at the Phoenix Comicon May 26th to May 29th. The display will include a town with over 50 square feet of towering buildings and speeding locomotives. In addition, the display will contain static models from all genres of science fiction and comics. Comicon is open to the public and kids twelve and under are free with a paying adult. To learn more please visit the Phoenix Comicon website.
Update:
Here are some pictures from the event.
Many fans of Lego are aware of the geometry of the brick, such as the fact that a standard brick has a 5/6 width to height relationship. Much has been written about the height of five stacked plates being the exact width of two bricks. Understanding the geometry of the brick is an essential skill in advanced construction techniques. With that said, there seems to be little attention paid to the need to occasionally connect some creation or another on a diagonal line. This technique is arguably less useful than the aforementioned height / width relationship, but the following information may prove valuable to some.
When attempting to connect a length of brick (such as a wall, etc) in a diagonal orientation, it is useful to know where the studs will line up. Whether or not they’ll line up depends on the length of the hypotenuse (the long edge on a right triangle). If the hypotenuse happens to be the exact distance of any multiple of the width of a brick, the studs line up. The formula for determining the hypotenuse is the trusty old Pythagorean Theorem. Considering we’re always working with right triangles, we simply count the number of studs on the length and width axis. Subtract one from both length and width. Then use the following formula to determine if the particular point has a hypotenuse which lines up.
![]()
For example, the smallest point at which the studs all align for a clean diagonal fit using a standard baseplate grid is a rectangle with the dimensions of 4 x 5. A 6 stud length of brick closes the hypotenuse, as shown below. The calculation can be a bit confusing because the actual measurement to find the hypotenuse is taken from stud center to stud center, rather than the typical measurement from outside edge to outside edge, as seen in the figure to the right. 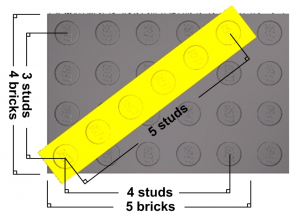
Carrying on the example in the figure, the length is 4 bricks and the width is 5 bricks. Subtract 1 from both to find the stud center to stud center length/width values (3 x 4). Then plug them into the equation above to arrive at:
![]()
We end up with a hypotenuse of 5 studs. Again, measured stud center to stud center. With this knowledge in hand, we can set out to calculate the direct line length from the point of origin to any other point on the grid. While the task may be relatively simple, the scope can be a bit daunting. After all, on a standard 48 x 48 stud baseplate that would require running the calculation for 2209 possible points! That is why I’ve come up with this guide to show exactly where those points are on the 48 x 48 baseplate.
Here is a top-down view of a standard 48 x 48 baseplate with each possible connection point shown with a different color 1 x 1 round plate. The lower left corner is the initial point of origin. The plates that are the same color are on the same plane. That is, they’re simply another step using the same calculations as the previous step, but using the last connection point to represent a new point of origin.
The following table shows each of the possible connections (by color) and their dimensions. The first value in each box is the stud center to stud center measurement, while the value in parenthesis (the “Real” value) is the distance in bricks.
| Length (Real) | Width (Real) | Hypotenuse (Real) | |
|---|---|---|---|
 |
3 (4) | 4 (5) | 5 (6) |
 |
5 (6) | 12 (13) | 13 (14) |
 |
7 (8) | 24 (25) | 25 (26) |
 |
8 (9) | 15 (16) | 16 (17) |
 |
9 (10) | 40 (41) | 41 (42) |
 |
12 (13) | 35 (36) | 36 (37) |
 |
20 (21) | 21 (22) | 28 (29) |
 |
28 (29) | 45 (46) | 53 (54) |
Orion Pax takes a break from graffiti and shows us all how to properly use those Bionicle Balls …or Bionoballs in his nearly 100% LEGO creation. He used non-LEGO to create the glass, but I think his indiscretion should be forgiven due to the sheer coolness of this.
I’d also add that I am a little upset about this one too. Just last week, I was standing in the lobby of a Chinese restaurant waiting for my food and began noticing the candy machines and thought about how cool it would be to LEGOize one. I hate being beat to the punch, but (again) I’ll let it slide. …just this once.
…but now I am safe and sound now. Back on the good old 27th floor.
That butthead, Ochre Jelly (Iain Heath) helps celebrate the 25th anniversary of Back to the Future with this iconic and lovely, action-packed scene from the second installment of the series. Its no secret that Iain is one of my favorite builders, and this vignette is a perfect example of why. Along with capturing the mood and motion from the movie, he also just built a scene from BTTF II… this build just oozes awesome. I tell you what, this thing is better than a screen door on a battleship!
Brittney (Brick Britt) nicely captures a sense of urgency and disappointment in the face and posture of this instantly recognizable character. I can’t say that I understand how the eyeglasses are attached, but I can say that she hit that nail square on the head.
Yeah, Whopper Junior does it again.
Brian Kescenovitz sets the standard for mechs with his ‘Dawn Forge’ series, but being the artist he is, he easily goes over the top even when he leaves his work unfinished. He seamlessly blends varied lines, combining elements in some pretty original ways to produce this masterful figure. …which appears to fully articulated.